
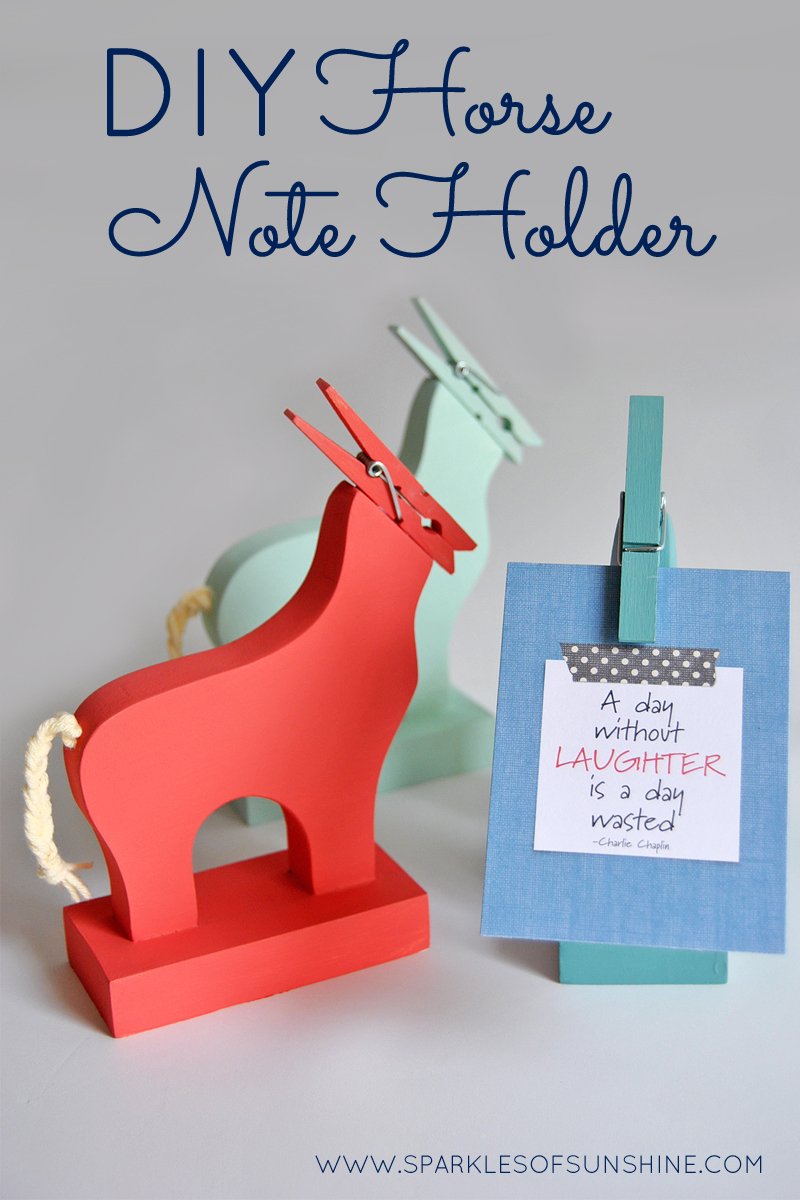
I’m always on the lookout for cute and colorful desk accessories, but sometimes I like to make my own. When I do, you know I have to share them with you, too. Today I’m sharing the love with a simple tutorial so you can make your own DIY horse note holder, too! Will you make one for yourself or to give as a gift? I suggest following my advice and make a few of them. This project is so adorable everyone is going to want one! This post contains an affiliate link. Click here to read my full disclosure policy.
Materials needed to make a DIY Horse Note Holder:
- Wood 3/4 inch thick
- jigsaw
- small drill and bit
- clothespin
- chalkpaint or other desired paint
- paint brush
- hot glue gun/glue sticks
- industrial strength glue (I used E6000)
- Horse Note Holder Pattern
- yarn
Project instructions:
Use the jigsaw to cut out the horse note holder pattern from a piece of wood. Use the drill to drill a small hole in spot marked on the pattern. This hole will be for the tail. Use the E6000 glue to attach the horse body to the base and let dry.
Now let’s paint! Take the clothespin apart. Paint all the wooden pieces with your desired paint.
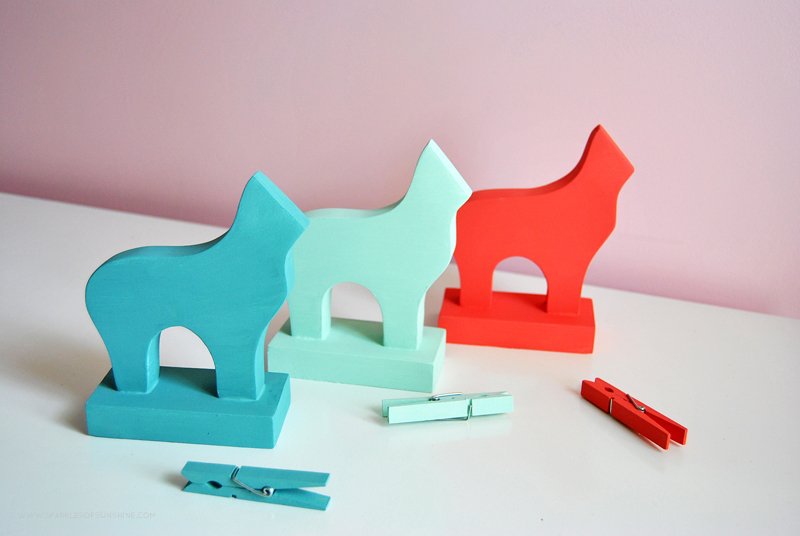
It took two coats of paint to cover my pieces appropriately. Once dry, put the clothespin back together and it’s time to finish assembling.
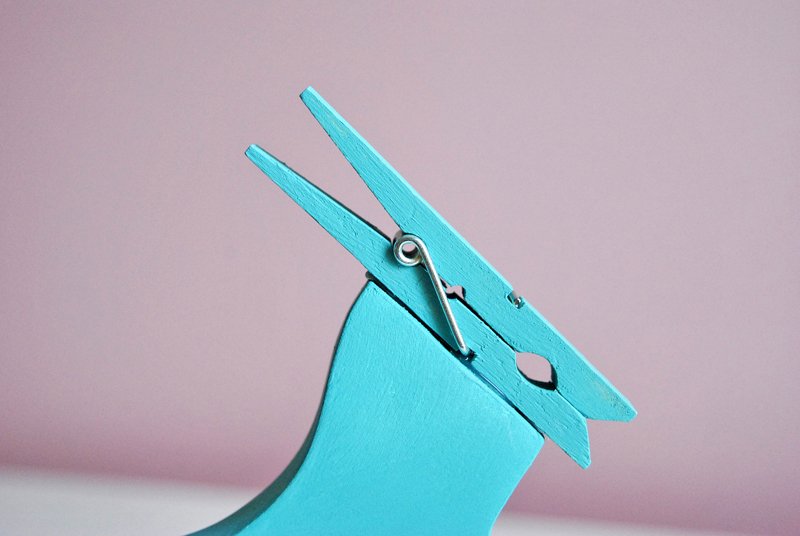
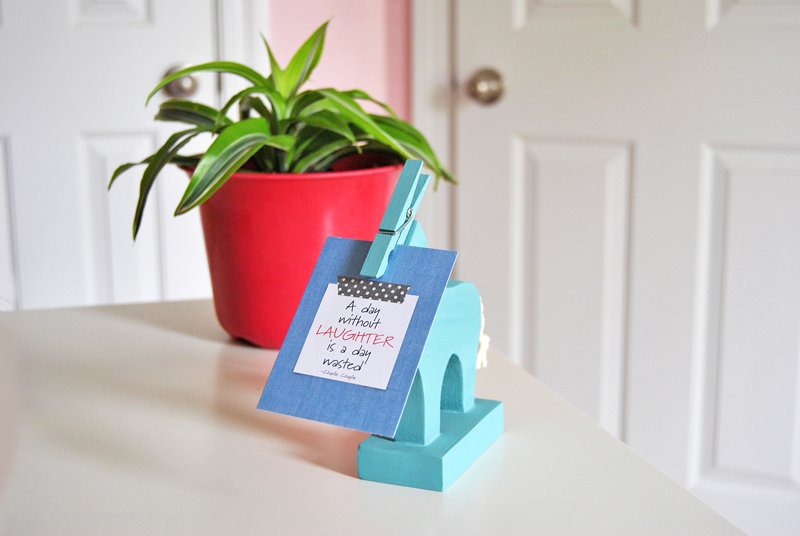
Use the hot glue gun to attach the clothespin to the base using the picture above as a guide. The clothespin serves as the horse’s head. How cute!
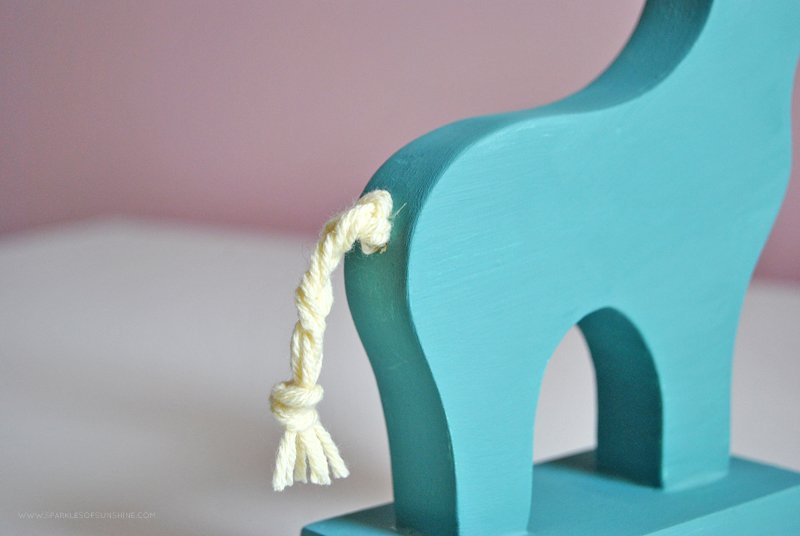
Cut short pieces of yarn and braid together for the tail. I used 6 strands and doubled up the yarn to make the tail thicker since my yarn was worsted weight and thinner than I desired. Use the hot glue gun to secure the tail to the horse. Use a pen or screwdriver to push the yarn into the drilled hole to cover the opening.
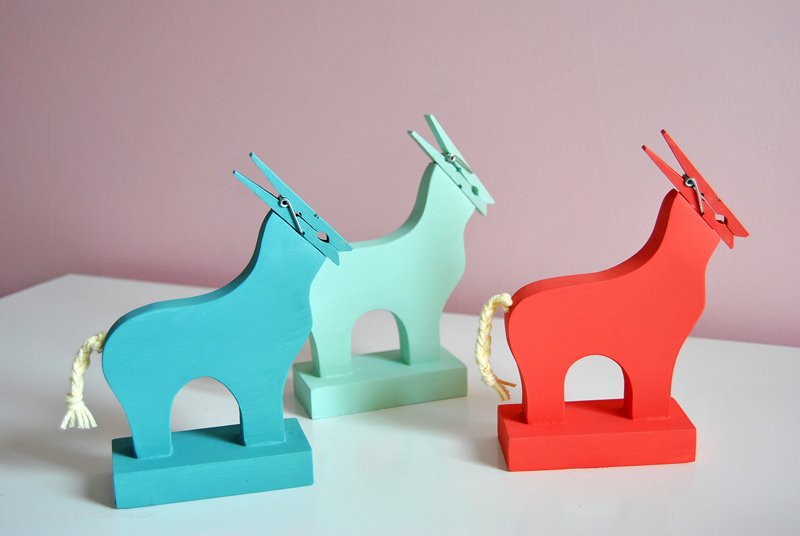
Oh my goodness….aren’t these colorful DIY horse note holders so pretty yet functional at the same time? I’m having trouble deciding which color to keep for myself. I want to keep them all, but two of these are going to find a home with friends. I hope you enjoy making your own!


what a great idea, can’t wait to make a few!
I’m so glad you like them, too! Have fun making your own!