
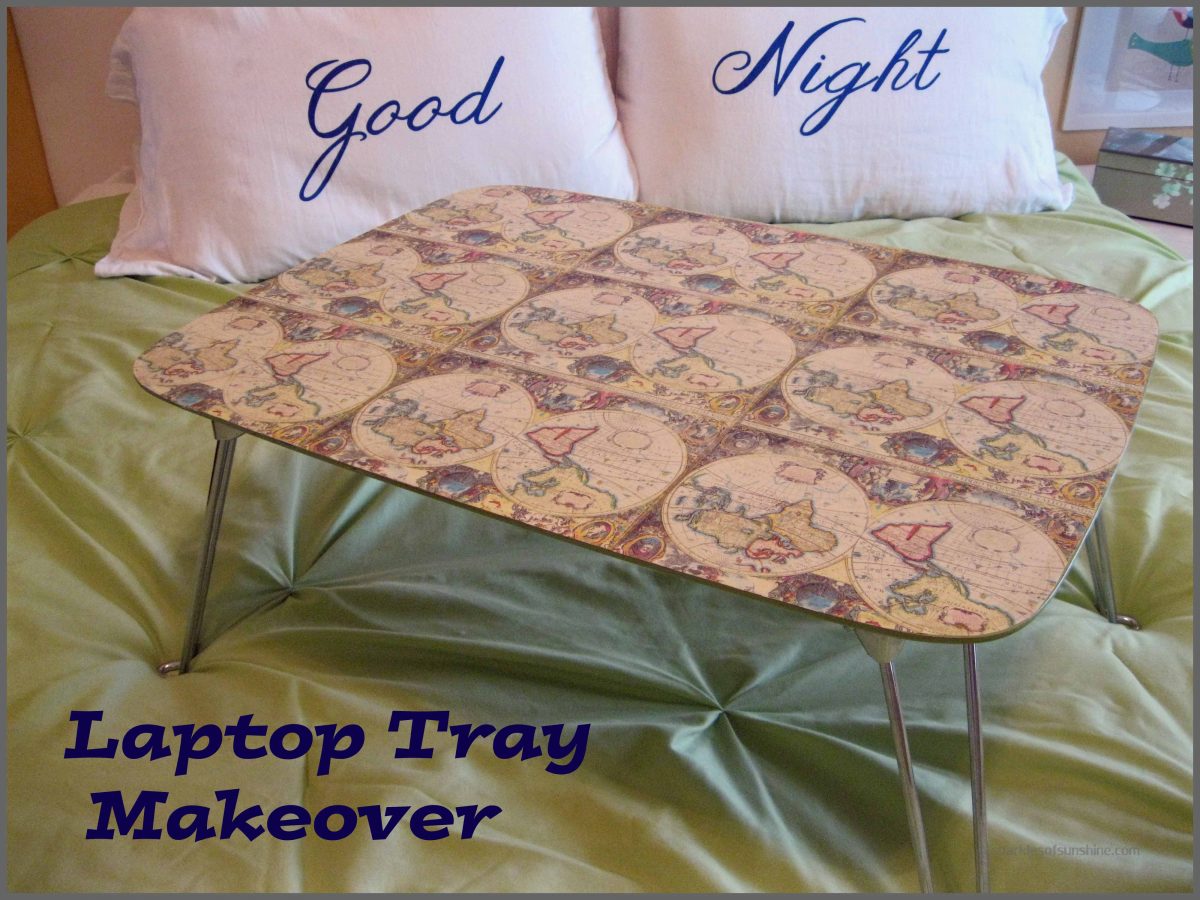
Welcome back for another thrift store find makeover project. To finish off this week, I am sharing my laptop tray decoupage project. Mod Podge anyone?
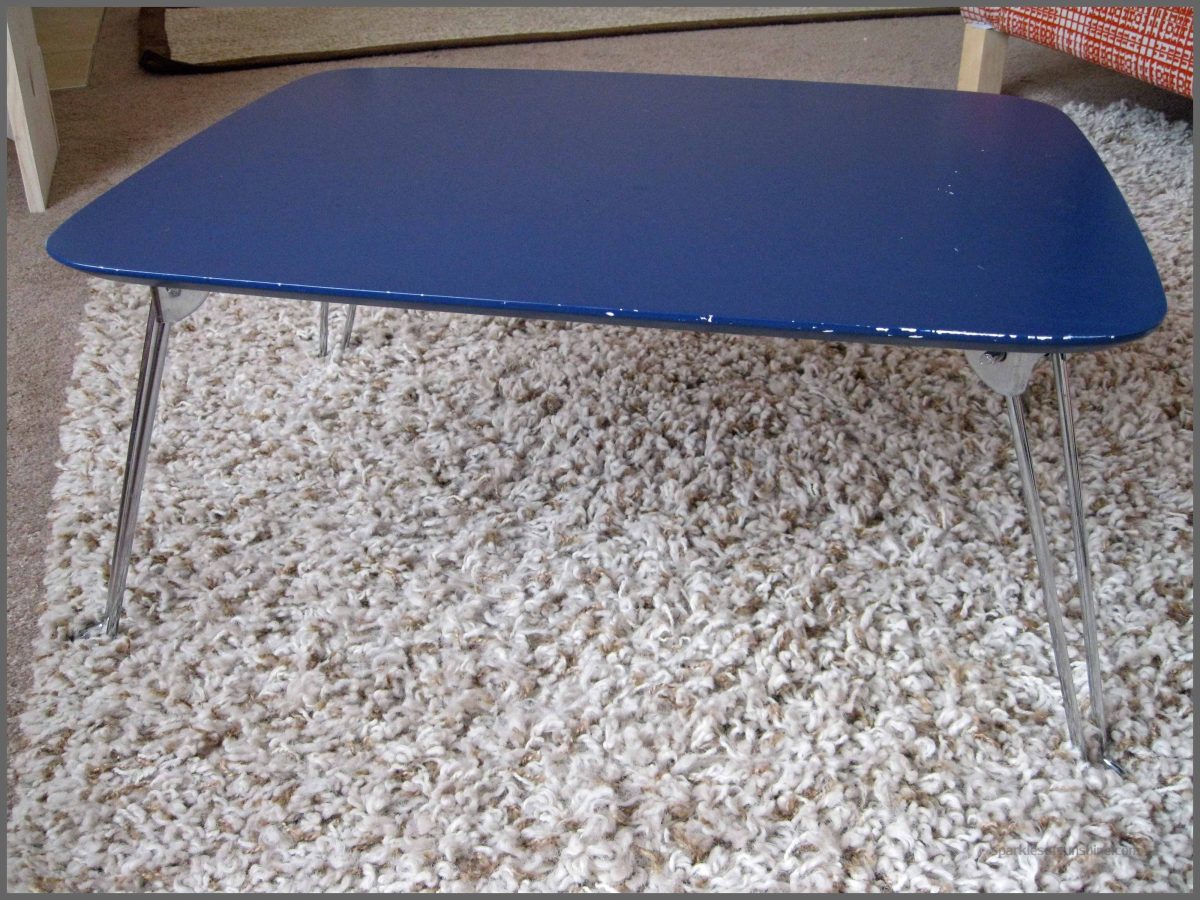
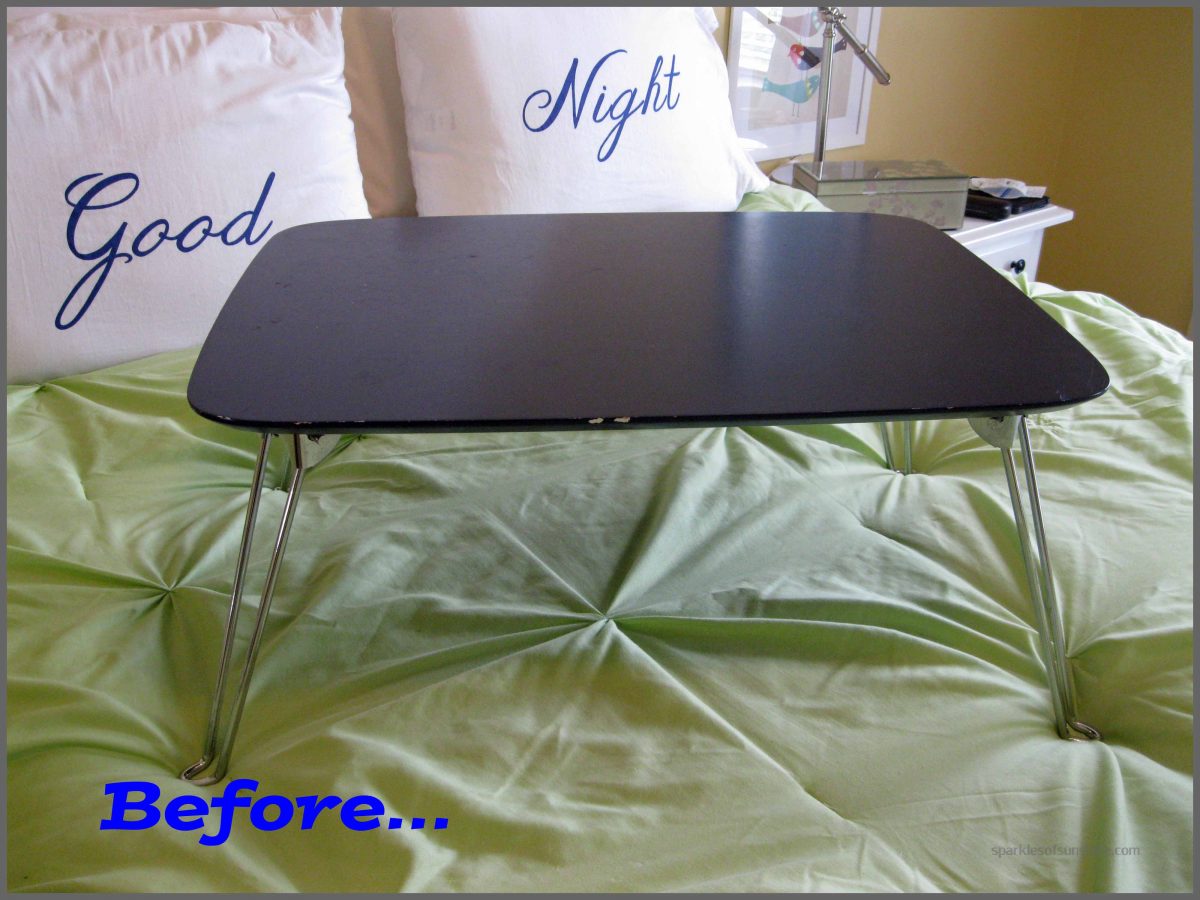
When I ran across this tray at our local Goodwill Thrift Store, I was originally planning on using it for parts. I really liked the legs on this tray because they fold down so it lays flat for easy storage. If you have priced furniture hardware before, you know $3.49 would be a steal for 4 legs like these, and I thought I could use the legs for another cool project. As I stood in the store, my mind was reeling with different projects that could make use of these legs. But…when I sat in bed that night to do some work on my laptop, out came the tray, and its usefulness convinced me to keep it intact. So I decided to make it beautiful instead. Even though it was in good condition, it still needed some work!
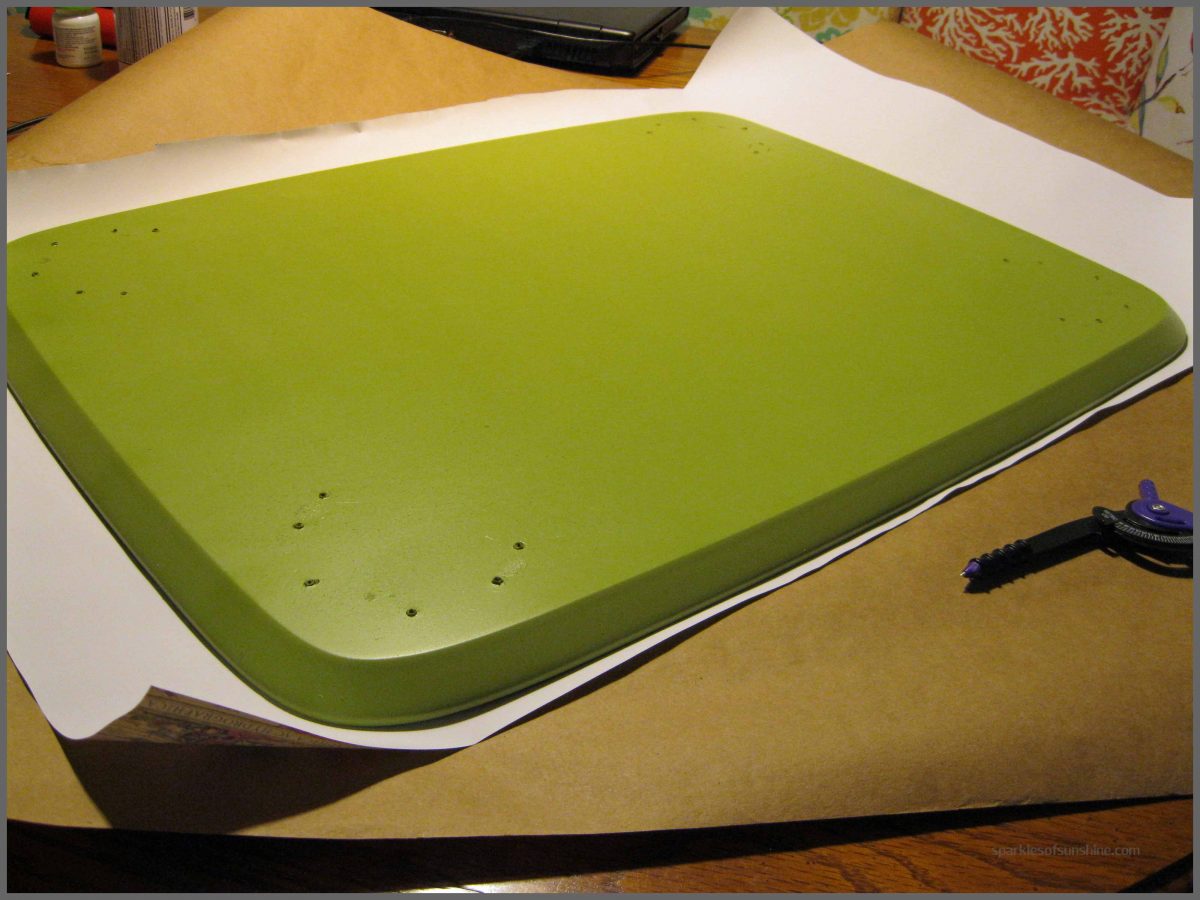
I immediately remembered this beautiful wrapping paper I’ve been conserving because of it’s beauty. Why not give decoupage a try? So far my decoupage projects had consisted of simple artwork and coaster projects, so I thought it was time to try a bigger project. My first step was to remove the legs and give my tray a coat of fresh spray paint. Next, I laid the tray on a piece of the wrapping paper, used a pencil to trace around it, and cut the shape out with scissors.
It is best to measure and cut so the paper fits before applying the Mod Podge, instead of after. I had to trim a little to make sure it was an exact fit before moving on to the next step.
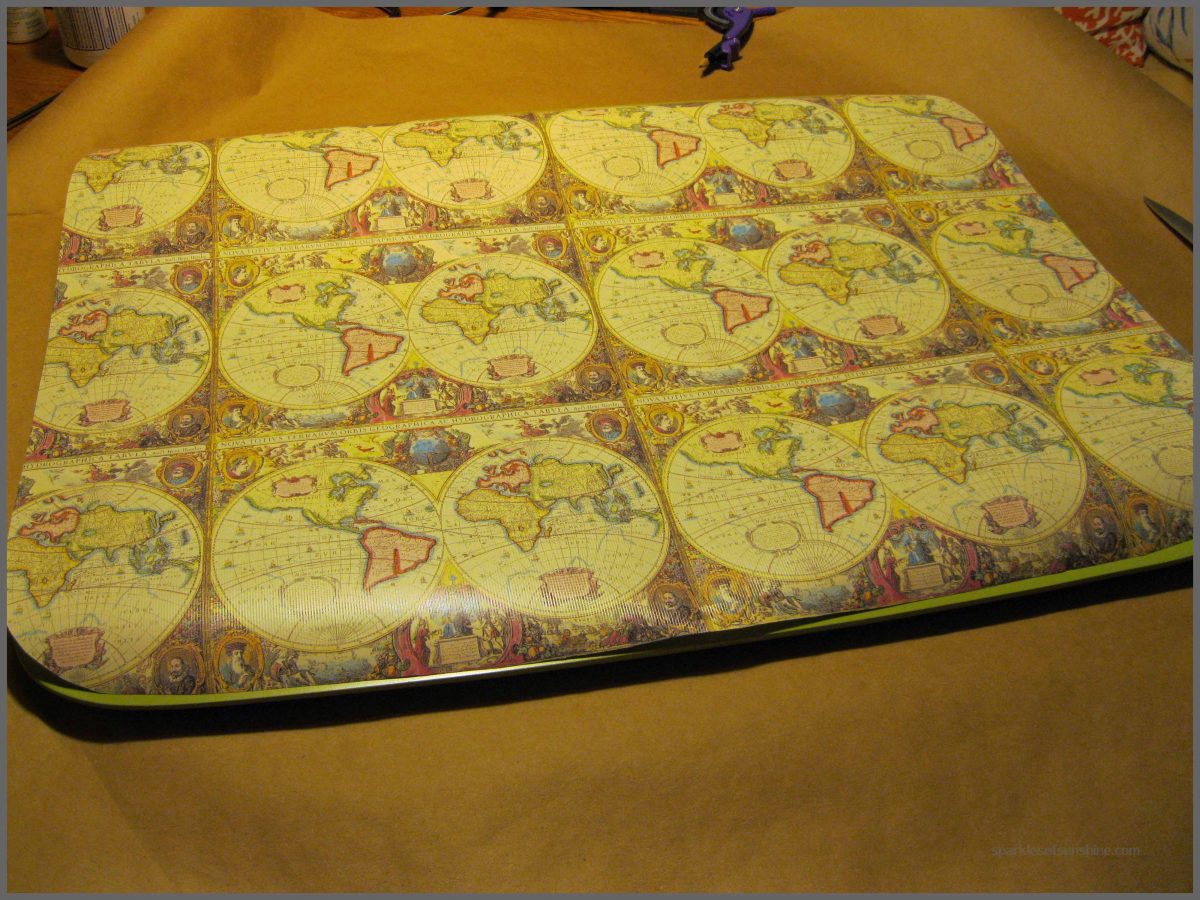
I used the Mod Podge Furniture Satin formula for my project since it was developed to provide extra protection for projects that are used frequently. The Hard Coat formula would be a good choice for furniture projects also. I followed the instructions on the bottle, and visited www.modpodgerocksblog.com for some great tips. Here are my steps of the decoupage process:
- I applied a thin coat of Mod Podge to the tray’s surface and to the back of the wrapping paper. Be sure to use thin coats when applying, because the more saturated the paper is, the easier it will tear. I learned this the hard way and had to start over!
- I attached the right side of the paper to the tray, making sure the edge was lined up correctly. I then slowly laid down the paper with my left hand, and used my right hand to smooth out any wrinkles. Now you know why I don’t have any pictures of this process!
- I used a brayer (roller) to smooth out wrinkles/bubbles, working from the center out to get rid of excess Mod Podge.
- I let it dry for 20 minutes before applying a top coat of Mod Podge. This is very important. You may be tempted get started immediately, but you must wait.
- I applied two additional top coats of Mod Podge to the tray, with 1 hour of dry time in between.
- Lastly, I applied a single coat Krylon Triple Thick Crystal Clear Glaze to seal the project and add more protection.
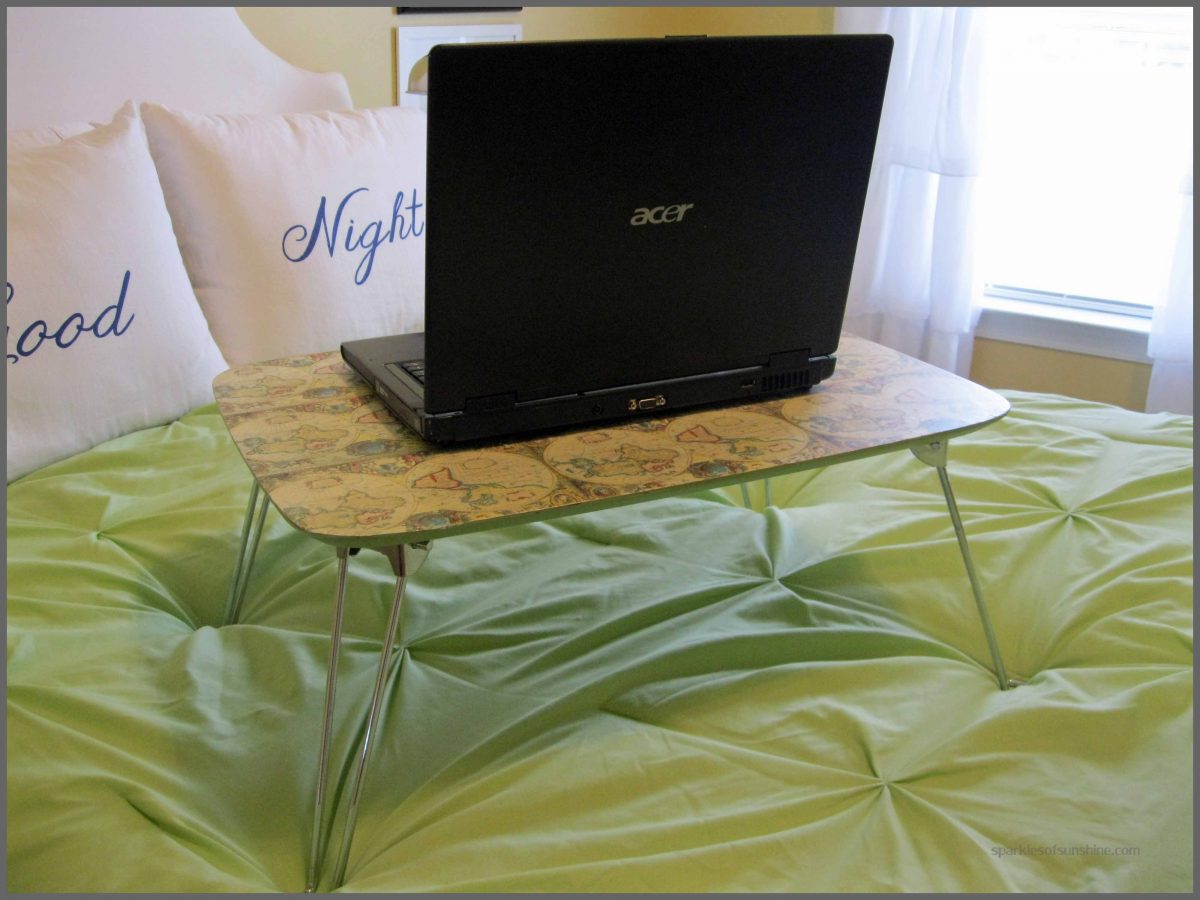
Want to see the result of all this hard work?

I really love the look of this tray now that it’s completed. I can’t help but smile at its beauty each time I use it. I am glad I’d been holding onto that wonderful wrapping paper!
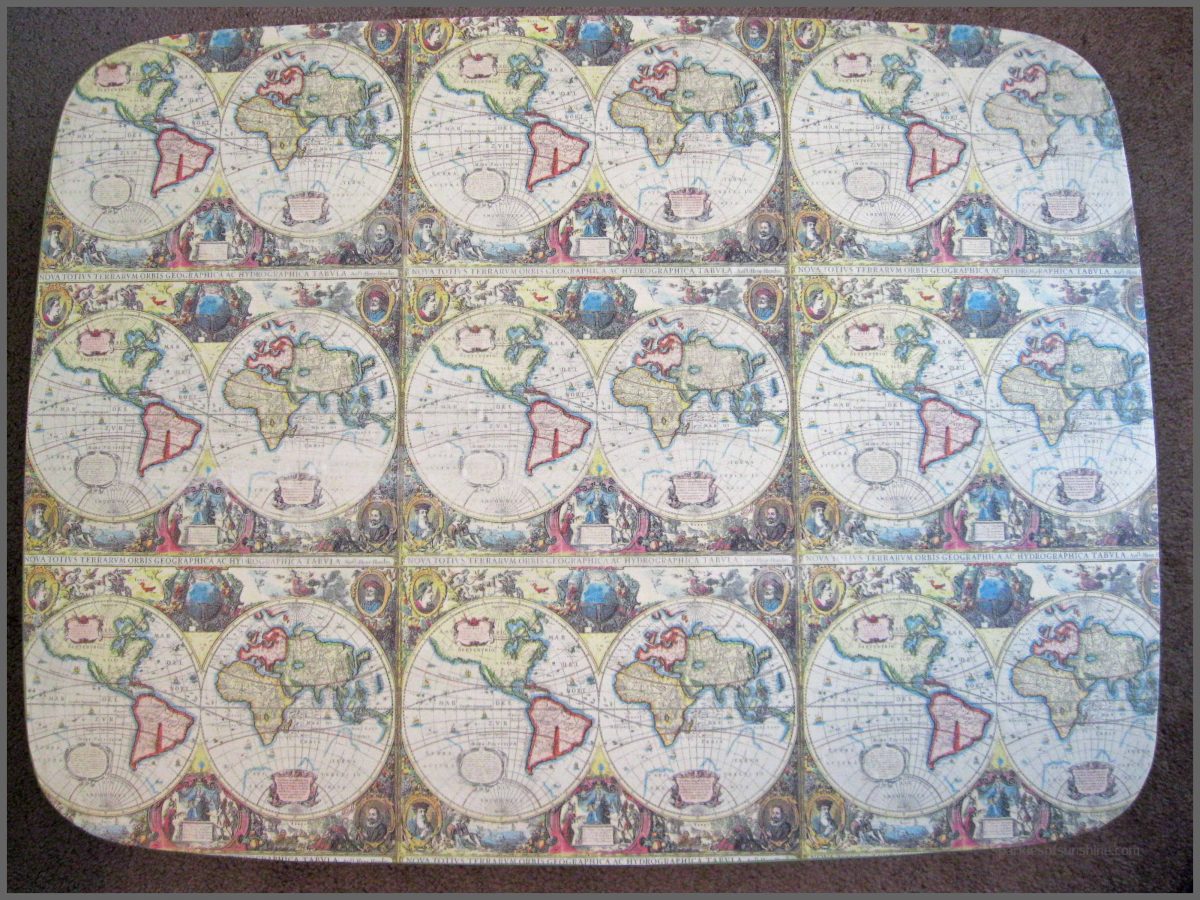
It looks so much better now. Check out the before and after pictures again!

In all truthfulness, I did not enjoy this project. I learned I am not a big fan of the decoupage process. It was not fun trying to get the wrinkles and bubbles out the paper without making tears. In fact, there are some small bubbles and one small tear in my project that can be seen if you look for them up close. I promised myself I’d try it at least once more before giving up decoupage for good. I also promise I’ll share it with you, and let you know my final decision.
What are your thoughts on decoupage? Have you ever tried it and have any special tips? I’d love to hear from you. Just a reminder…you have until Sunday to check out my post on Crocheted Ruffled Flip Flops and enter to win a pair for yourself. Have a great weekend!
Shared with: Share It Link Party


[…] stools. If you don’t know how to decoupage, check out my previous post with instructions here.I must say I’ve changed my mind about decoupage. It was super easy to adhere the scrapbook […]