
 If you missed my post about this chair last week, be sure to check it out so you can truly appreciate this transformation. After a failed attempt at painting the fabric on this chair, I was ready to call it quits and throw it in the trash. I was so close to taking a trip to the landfill when I heard it calling out to me. It spoke and I listened. So back to my junk room it went. After a couple of months, I finally mustered up enough courage to try reupholstering this classic chair. Let’s see how the cane chair goes glam!
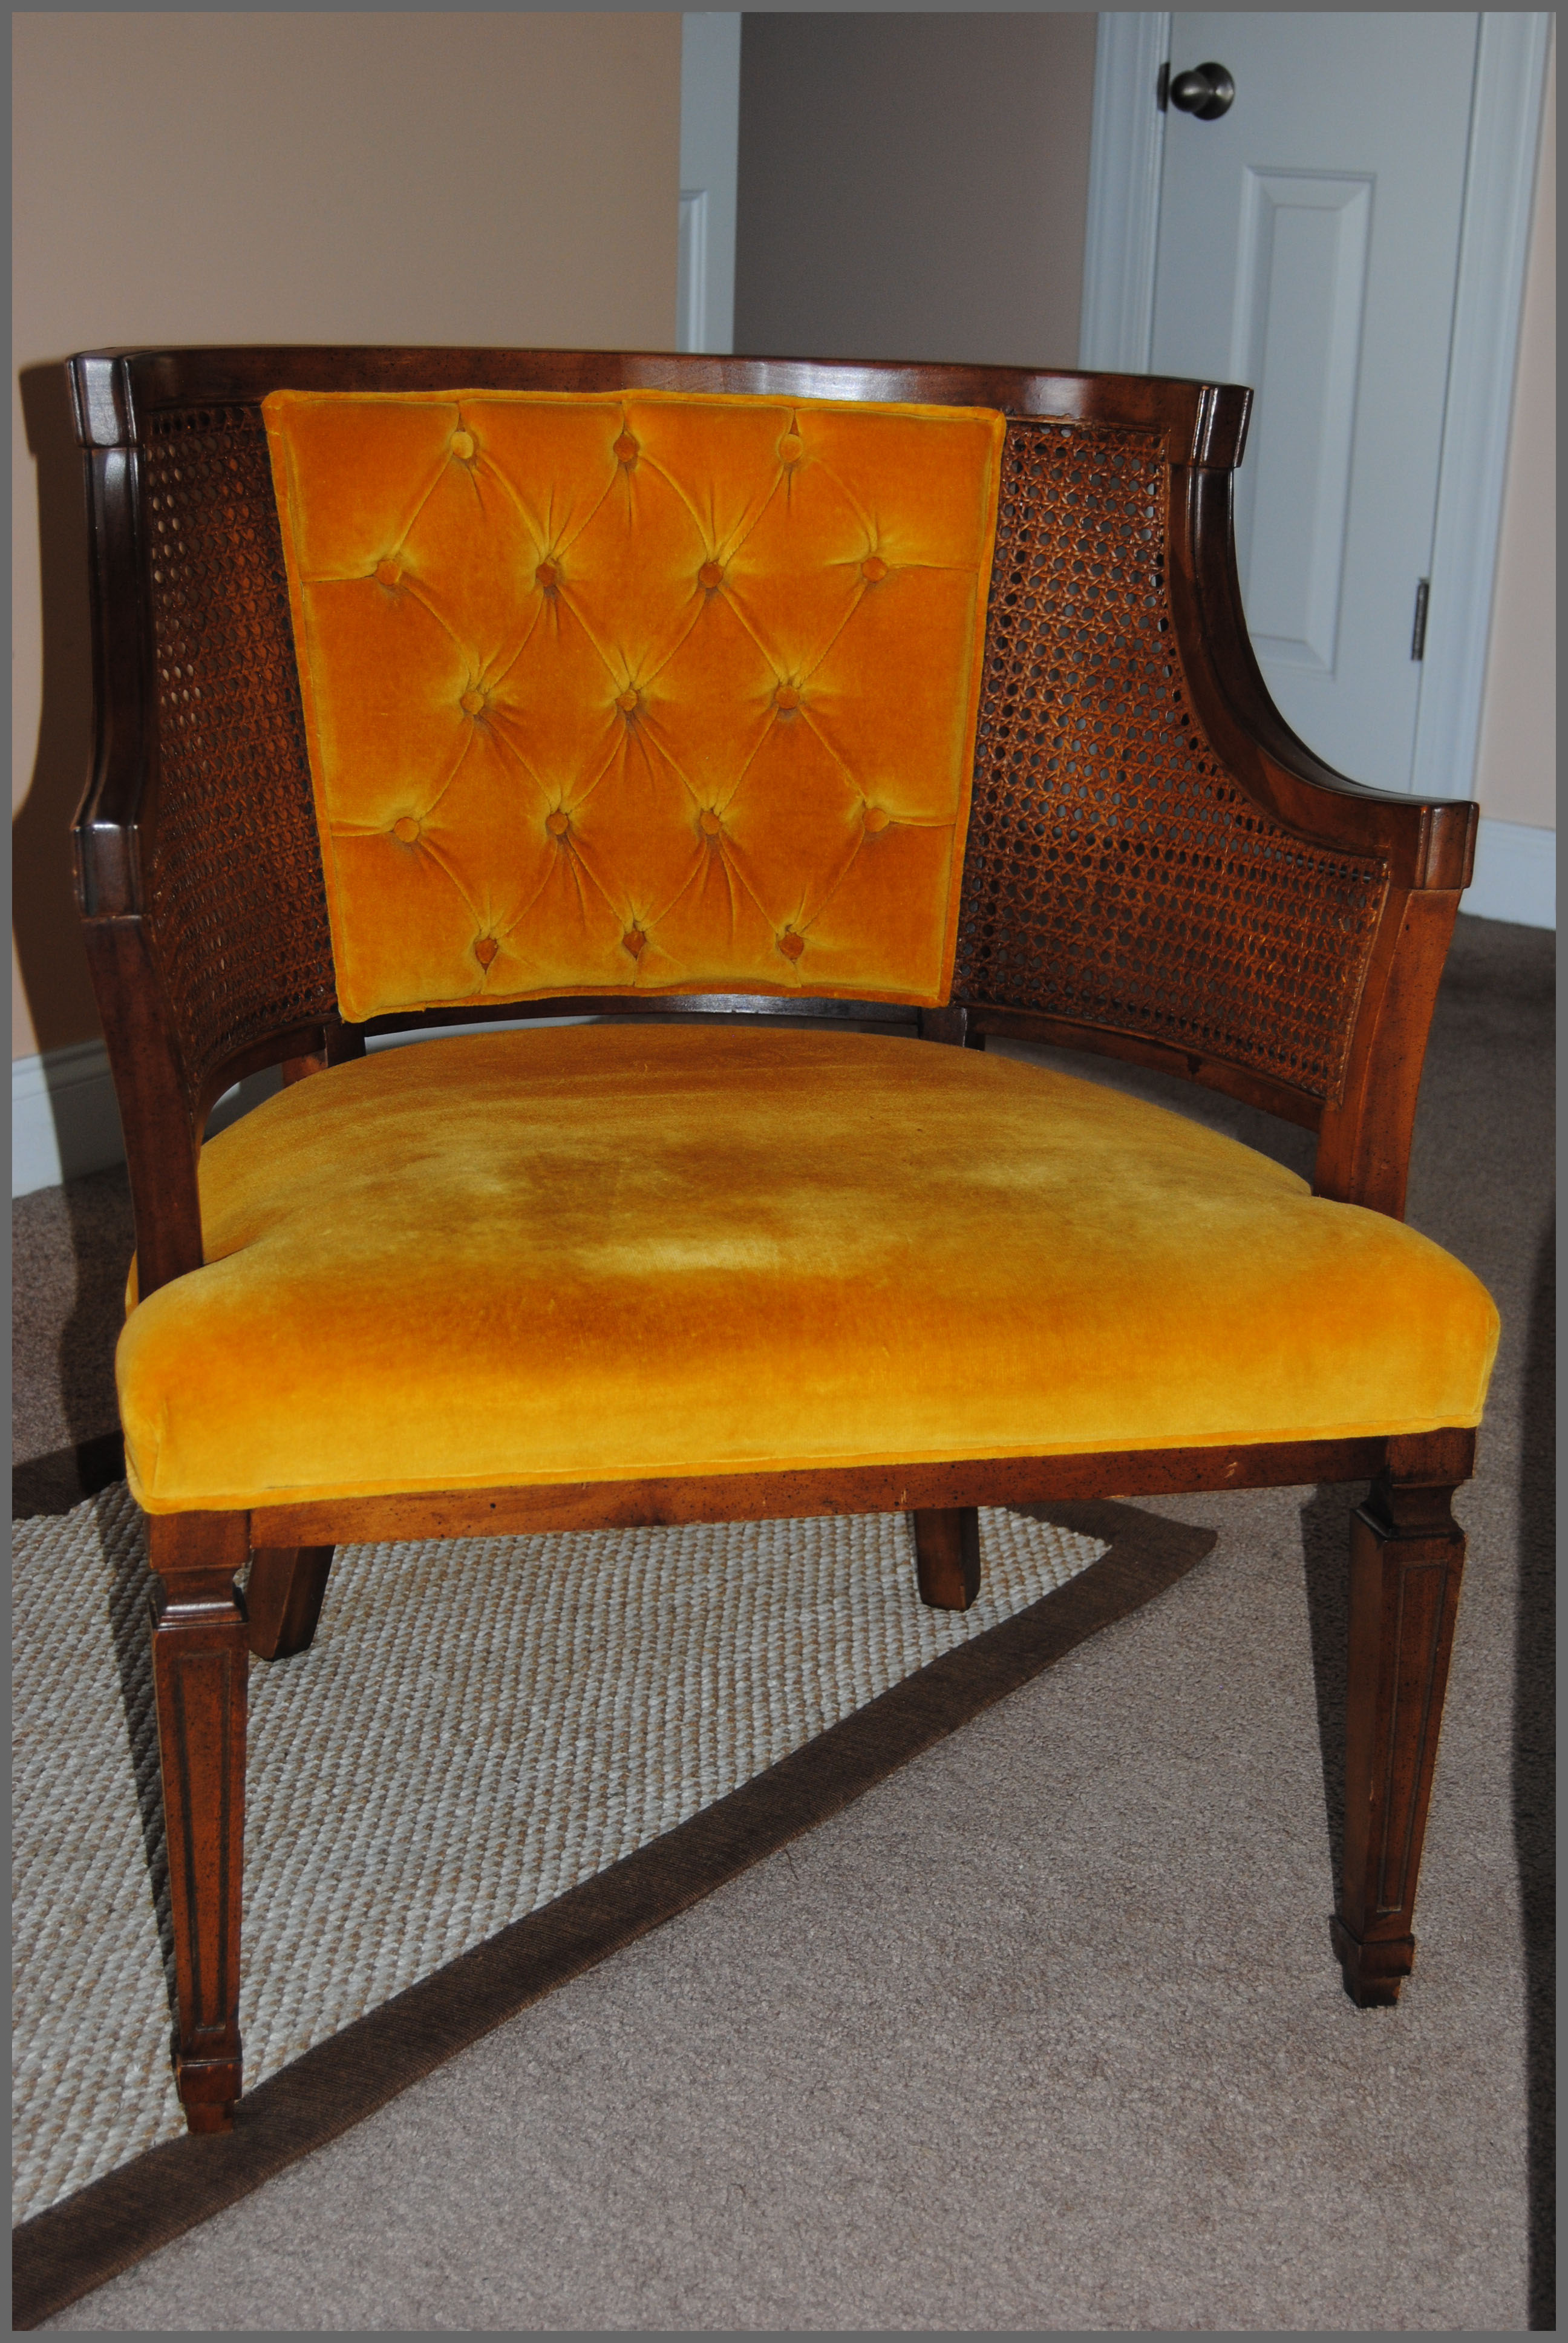 Yes, when I spotted this chair at The Salvation Army Thrift Store, I knew it had potential. Even though the fabric was outdated, the springs and foundation of the chair were comfortable and sturdy. After doing some research online, I decided to try reupholstering the chair. In the past the only upholstering I had done was chair seats or benches. These are simple projects since all you do is layer foam, batting and fabric, and fold and staple over the sides to the wood. Reupholstering this chair would challenge me to learn more skills since it would require concealing staples since the fabric is stapled directly to the chair frame where it can be seen. This is the reason why I tried painting the upholstery first. But alas, it wasn’t meant to be, and it was time to force myself into the unknown world of reupholstering. Ready to join me? I’m more than happy to have you come along. In fact, transforming this chair from boring to glam was actually a lot easier than I thought it would be!
 First, we started by removing all the ugly painted on fabric and staples. This was a hard job since the paint had seeped through the fabric, but it will be easier if you if you start this project from the beginning. I highly recommend skipping the failed attempt step! We also removed the foam and cardboard from the back of the chair since it originally had a tufted back and I was going to change that. I simply replaced the old foam with a new layer of foam. When you are removed the fabric from the chair, be mindful of what you are doing. Notice where the fabric was stapled to the chair so you can remember to staple in the same spots when the time comes. Also, remove the fabric carefully so it will remain intact. It’s very important to keep it intact because you will need it later on. I’ll explain why in a later step.
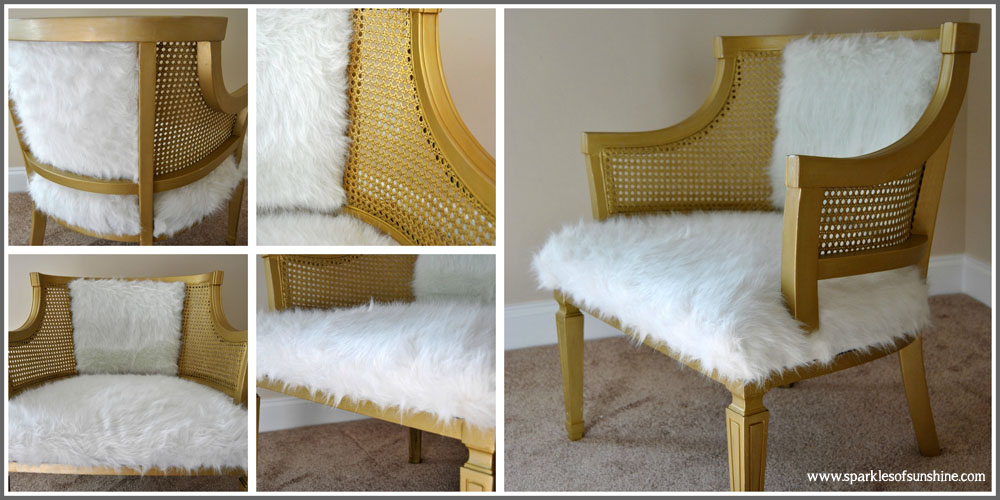
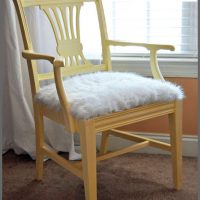
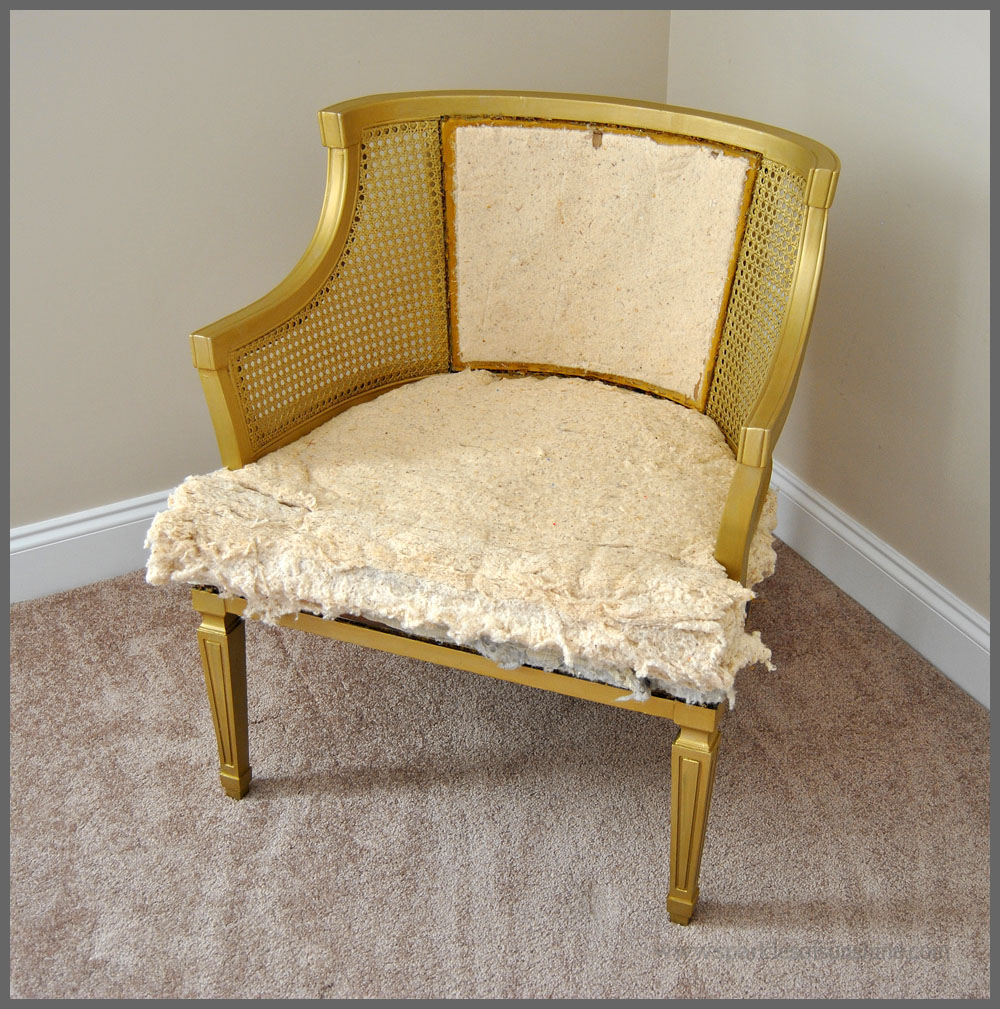 Once all the fabric is removed, you can go ahead and paint the chair frame. You definitely want to do this first before you start adding fabric back to the chair. Since I wanted a glamorous look for my chair, I decided I wanted to paint my chair gold. I had some leftover fabric from my recent Antique Chair Revival project, and I couldn’t wait to glam up this cane chair with some gold and fur. I mean, what lady doesn’t like gold and fur? This beautiful fabric is not only soft and cuddly, but there’s also another reason why I chose this fabric for my project. The furry texture of the fabric can hide staples really well, and since this was a new adventure in developing my upholstery skills, I thought that might come in handy. Believe me, it did!
I think I may have squealed a little when I spotted Folk Art Home Decor Chalk Paint in Metallic Gold at my local Jo-Ann Fabrics & Craft Store. It is one of my favorite paints, and since it was too cold to use my gold spray paint in our shop, I was so happy to find this chalk paint! It allowed me to paint the chair indoors in my kitchen while I was waiting for dinner to cook. Sounds like a pretty glamorous life, doesn’t it? It does to me!
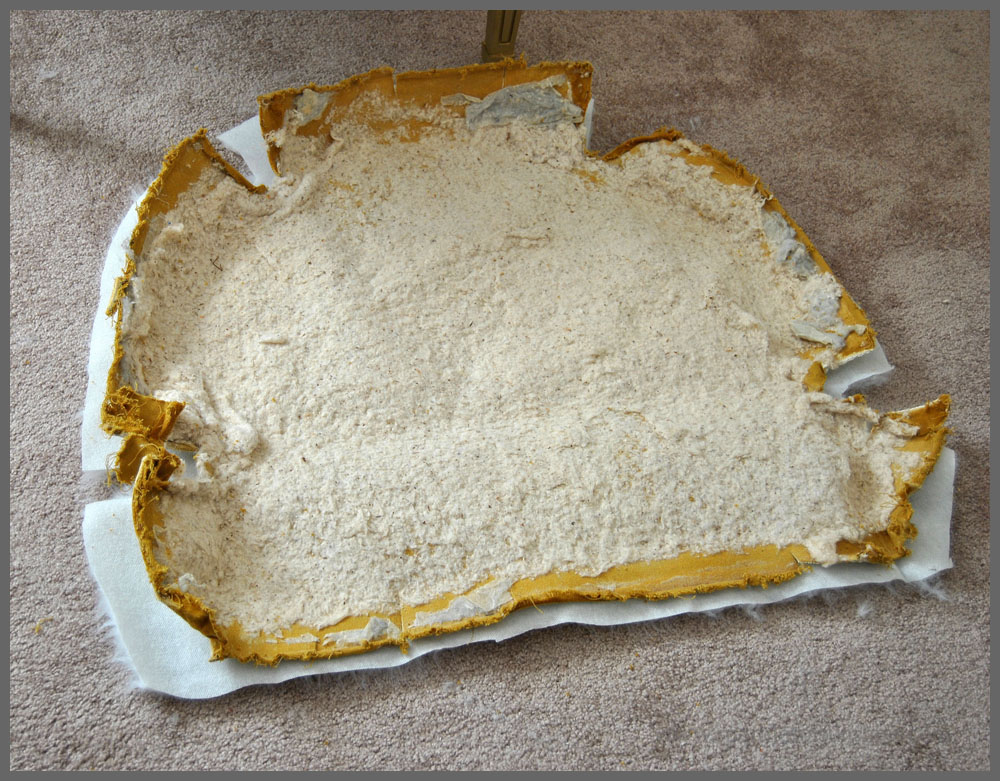 Once the chair was dry and golden, it was time to cut the fabric. Remember the old fabric we saved earlier? Well, lay the old fabric over the new fabric, and use it as a stencil to cut out the pieces you will need. It really makes the project a lot easier when you can use the old fabric as a pattern. Who knew reupholstering this chair could be so easy?? Well, it gets a little more complicated, but trust me, not too much!
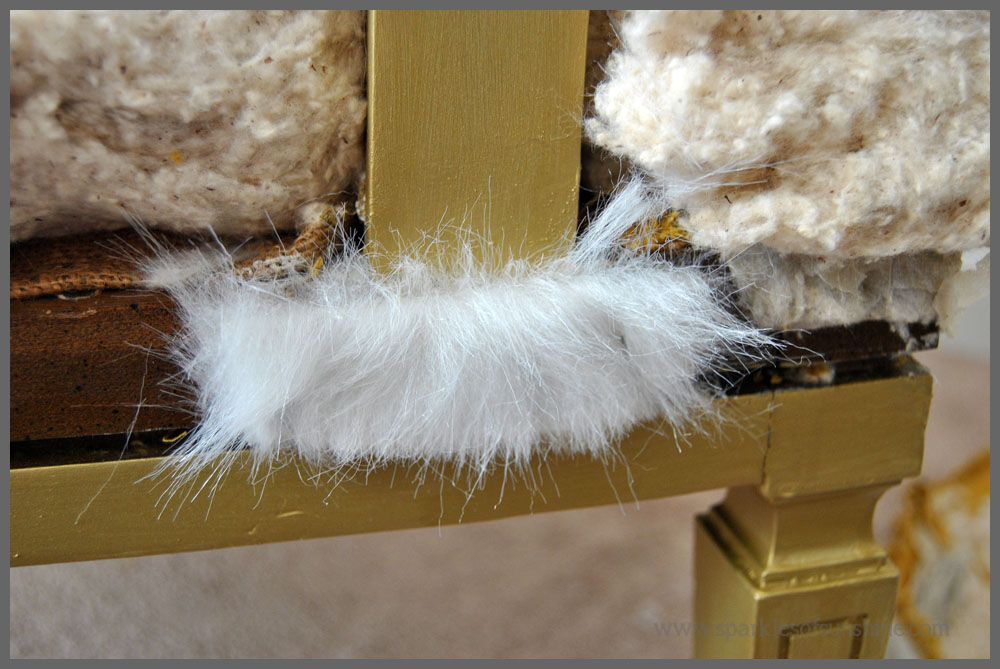
Once the chair us painted and the foam/filling back into place, simple lay the fabric over the chair. Once you make sure the fabric is lined up correctly, stretch the fabric and use your staple gun to secure it to the chair. Remember to staple it in the same places where it was stapled before. In the picture below, see the groove between the wooden portion of the chair and the gold painted portion? That is where the old fabric was previously tucked and stapled, so I did the same with the new fabric.
 It was pretty easy stapling the fabric to the chair. The only difficulty was where the arm of the chair meets the base. I simply cut a piece of small fabric, folded it over and stapled it directly to the chair. Once the larger seat piece of fabric was stretched and stapled into place, you couldn’t see a seam or staple.
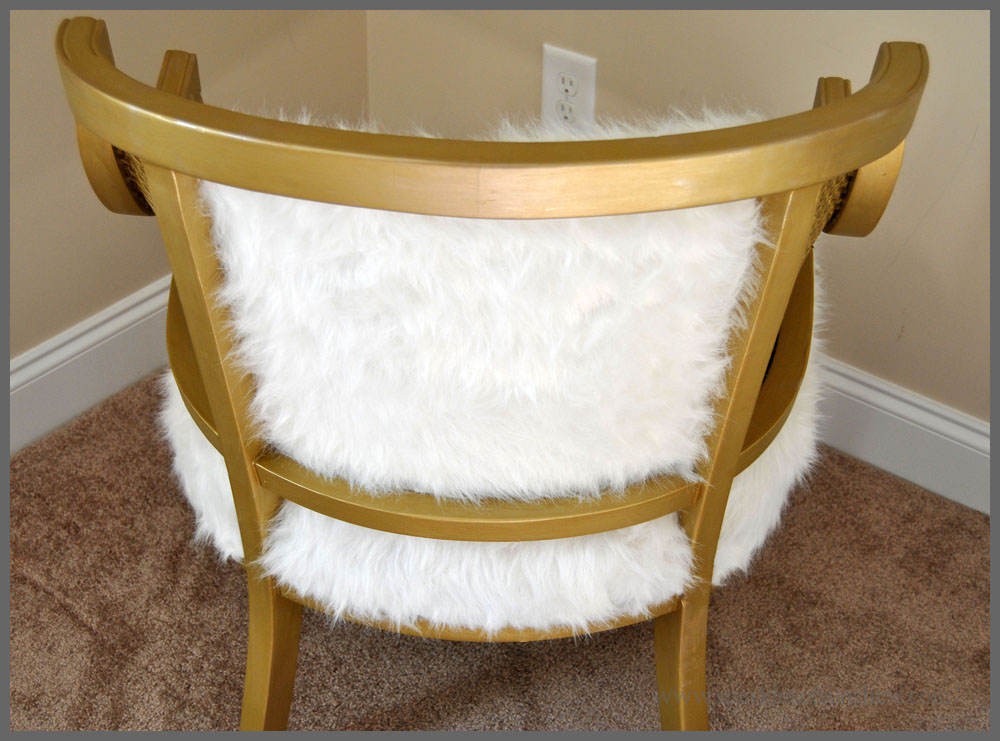 For the back of the chair, I cut out a piece of fabric and used the hot glue gun to secure it into place. I simply glued it right on top of the old fabric. No one will ever know!
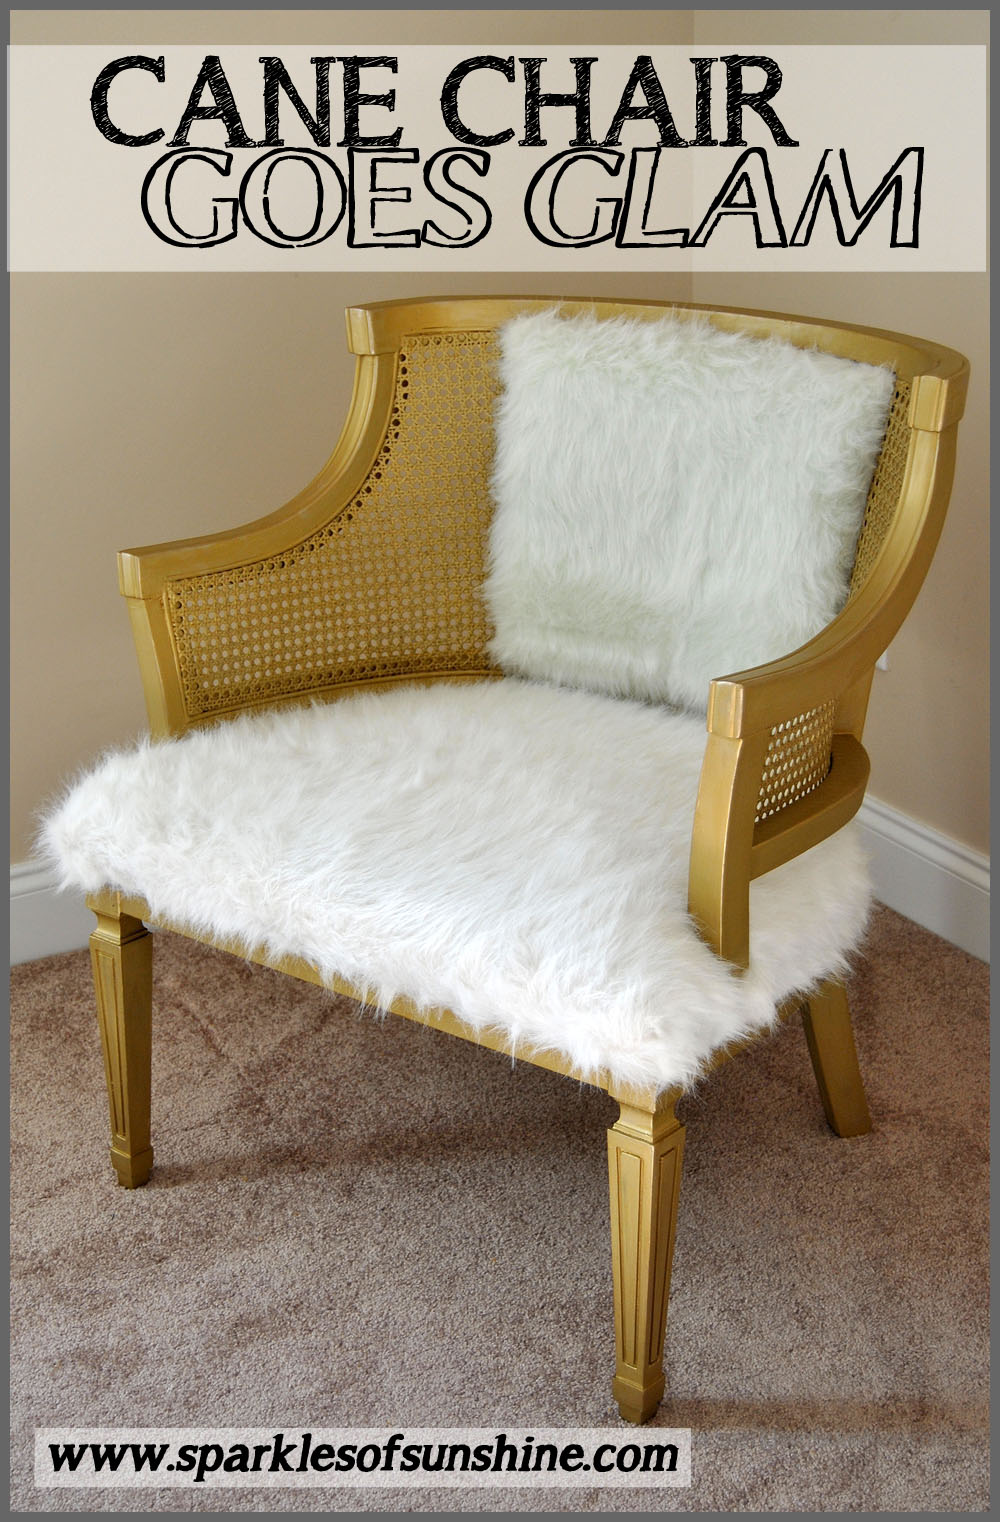
At this point, if there are any visible staples you can buy coordinating trim and hot glue it to the chair around the edges to cover it up. I didn’t have to do that since my plan worked perfectly. See the soft furry fabric hanging down covering up any unsightly staples? Pure genius, I must say!
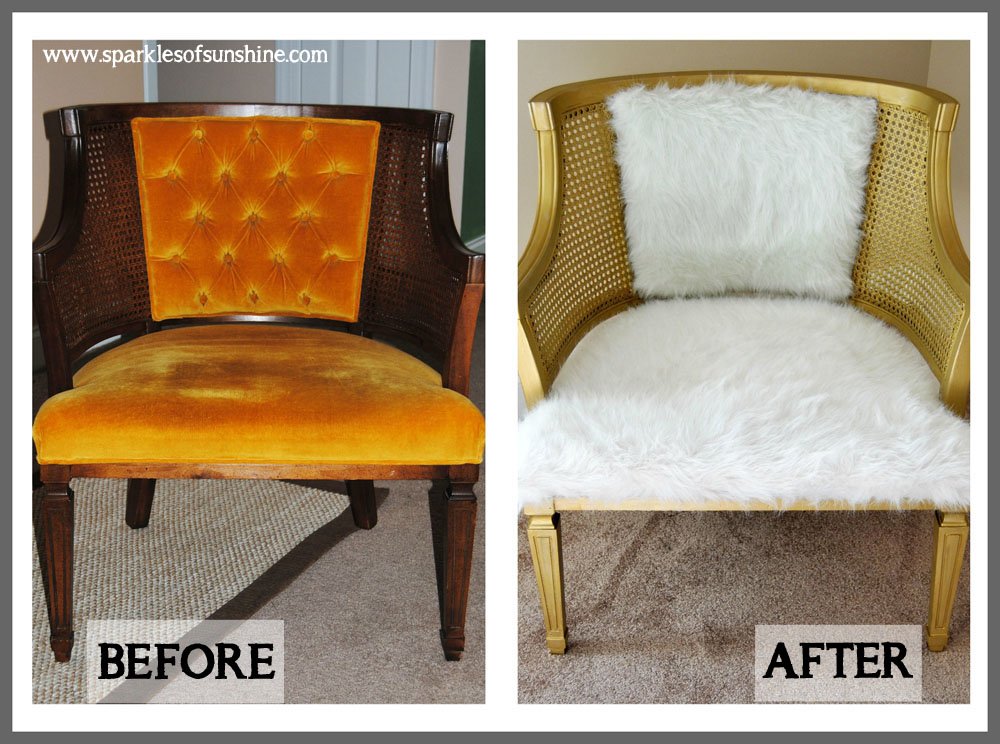
Alright, let’s take a look at the before and after pictures of this velvet tufted cane back chair! I am so pleased with this chair makeover project!
 I really am in love with this chair, and I don’t think I will let anyone else sit in it. I’m actually thinking of using it as my office chair. What do you think? Wouldn’t a set of casters make this the perfect chair to sit in at my desk while I’m writing my posts? I think so!
 I am so glad I didn’t give up on this chair! Aren’t you? Well, it wouldn’t be right if I ended this post without thanking my hubby for his help with this project. He pulled out many a staple for me while removing the fabric from the chair. Yes, those were his fingers in the picture removing the fabric, not mine. But only because I was taking the picture, of course! It’s really nice when we get to do a project together, and I was so grateful he helped me with this one. It is much easier to upholster a bigger project like this one when you have an extra set of hands to pull and tug on the fabric while you staple. Now that I think of it, I guess I’ll have to let him sit in the chair, too. He earned it!
I hope this post will help you consider trying an upholstery project of your own. I never thought I could do this, which is why I tried painting the upholstery first. I’m really glad that didn’t work out because it forced me to try a new project and expand my skills. Remember the phrase, “No pain, no gain”? Sometimes it’s worth pushing yourself to do something harder than you want so that you learn more. I feel so much more confident in my upholstery skills now, and I can’t wait to find a new project to work on. What do you think it should be?
Shared with: Bloggers Brags, Made by You Monday, Frugal Crafty Home Blog Hop, Share It Link Party, Treasure Box Tuesday, Lou Lou Girls Fabulous Party, Do Tell Tuesday, Teach Me Tuesday, Create Link Inspire, Creative Spark Link Party, Worthwhile Wednesdays, Pin Worthy Wednesday, Retro Re-Pin Party, Create & Share DIY and Recipe Party, On Display Thursday, Think and Make Thursday, Thursday Favorite Things, Your Turn to Shine, The Creative Exchange, Morning Cup of Joe, Home Matters, The Pin Junkie Link Party, Craft Frenzy Friday, Inspiration Spotlight


I love how this turned out! I have an old chair that I love, but is in bad shape. This inspired me to redo it! #PeonyProject
That is awesome! Yes, I love giving old chairs a makeover. 🙂 Let me know how it goes!
I have always been impressed when I see people doing things like this. Super cool! You did a great job. 🙂
Thanks! This project was more difficult than some I’ve done in the past, so I’m really happy at the result. Thanks for taking a look!
Popping over from the Frugal Crafty Home Blog Hop. I have to say that is one sweet chair makeover Christie – love it!
Thanks so much, Marie! I’m so glad you like it, too!
What a sassy chair! The fur really adds a lot of personality & glam.
Thanks! Yes, I feel pretty glamorous sitting in it right now. 🙂 Thanks for taking a look at it today!
Another fantastic job! You and your husband are a great team! Keep sharing your great creative ideas
Thanks, Carole. I think we make a pretty good team, too. I’m so glad you like this chair! XOXO
So much glam! I love it!
Thanks, girl! 🙂
This looks absolutely amazing! What a great find and I love how you made it over.
Thanks so much! I was a fun project, and I’m enjoying my new chair so much right now!
OMG I am loving this Christie! I am going to go to JoAnns tomorrow and see if my store carries the metallic gold! I NEED it! I would feel like a queen sitting in this chair! It would be my chair to paint my nails, or read a book…but since you live to far away for me to sit in it I will just have to pretend lol.
Thanks,Jess. Yes, I was super excited to find the metallic gold chalk paint! They also had silver, so there’s a jar of it with my name on it I need to pick up soon! 🙂 I am sitting in the chair right now and must admit, I have no intention of getting out of it anytime soon!
Oh what a fun looking chair! You did a great job on it! I’m a new follower from your Wordless Wednesday link up on Twitter.
That is so great! Thanks so much for stopping by!
This is such a neat project that turned out really well. It looks so comfi, too. I love the faux fur look, too.
Thanks! I’m actually sitting in the chair right now, and it is SUPER Comfy! 🙂 I’m glad you like it, too!
Wow!! So, you were able to salvage your chair. it looks awesome.
Thanks, Trish! I’m so happy with my final result! 🙂
Hi there! Thank you so much for visiting the Bloggers Brags Pinterest Party this week. Your post has been shared on the BBPP Pinterest Board for all the world to see. 🙂 Please come back next week to share your new posts. Have a fabulous week!
Thanks, Sandy. You have a blessed week, too! 🙂
Yay! Love! You did such an amazing job of salvaging it! I’m so glad you didn’t give up 😀
Thanks! I am so glad I didn’t give up, too! 🙂
Oh I used to have a similar gold chair! What fun to have made it over! Thanks for linking up with us at the Home Matters Linky Party this week! #homemattersparty
Thanks so much for stopping by! I love linking up at the Home Matters Linky Party!
That is beautiful!
Thanks! I think so, too!
Awesome chair make over! Shared….I will be featuring your project this week! Thanks for sharing at the Inspiration Spotlight and look forward to seeing you again soon.
That sounds great! I can’t wait to see it! 🙂
Your chair is gorgeous!! I would love it if you would share your creativity at the Friday Favorites Link Party, happening every Friday at Mustlovehome.com!
Thanks, I’ll check it out!
I love this chair! You should link it up to our feature friday linky party!
Thanks so much!