
Note: This post contains affiliate links. If you click on the links and make a purchase, I will earn a commission, and there is no additional cost to you. You can see my full disclosure policy here.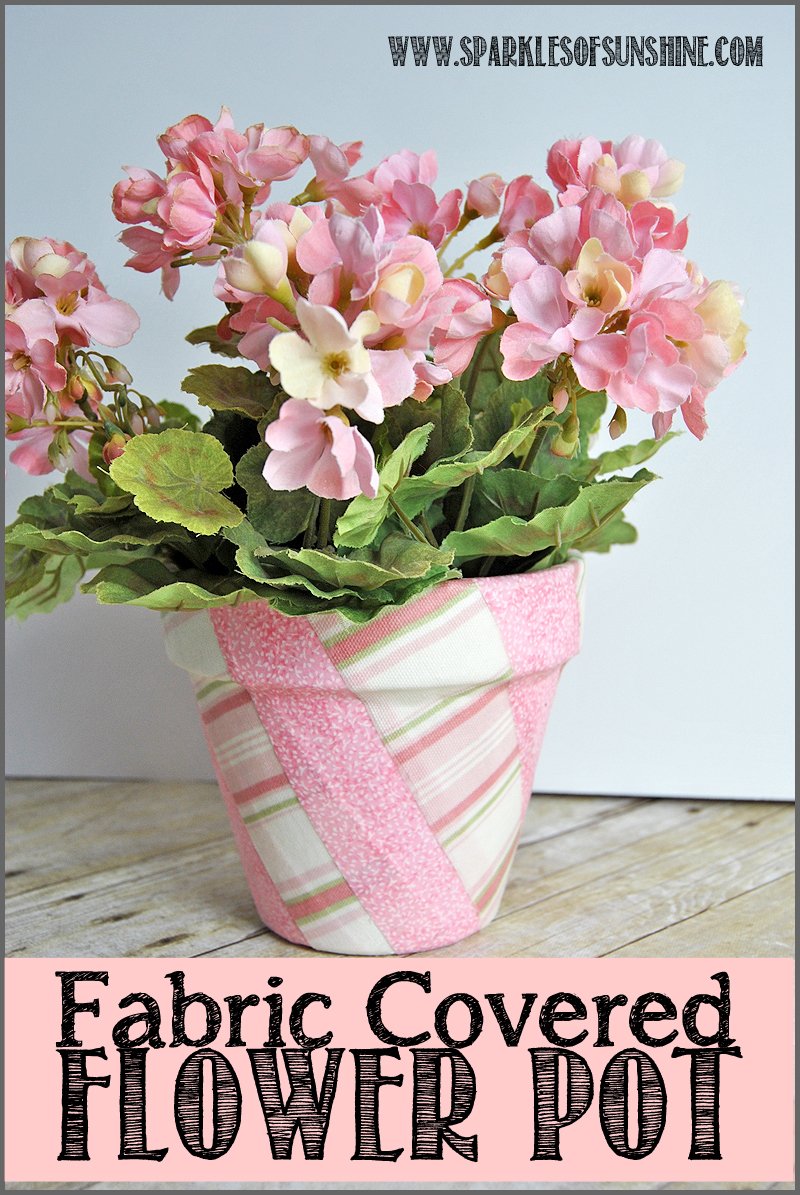 Do you enjoy the Spring season? Spring is one of my favorite times of year! I love flowers, and there is nothing like watching everything come back to life after a long winter. When I see my crocus, daffodils and tulips peeping through the ground, I get so excited since I know warmer weather is one the way. Of course, that means allergies are on the way, too, but that’s OK. When I see my weeping Cherry tree in bloom, I forget all about them! Today I’m sharing with you my latest Spring inspired project, a Fabric Covered Flower Pot. This project will change your current flower pot from boring to bold, and it’s surprisingly easy to make. All you need is fabric and a few other supplies to get started.
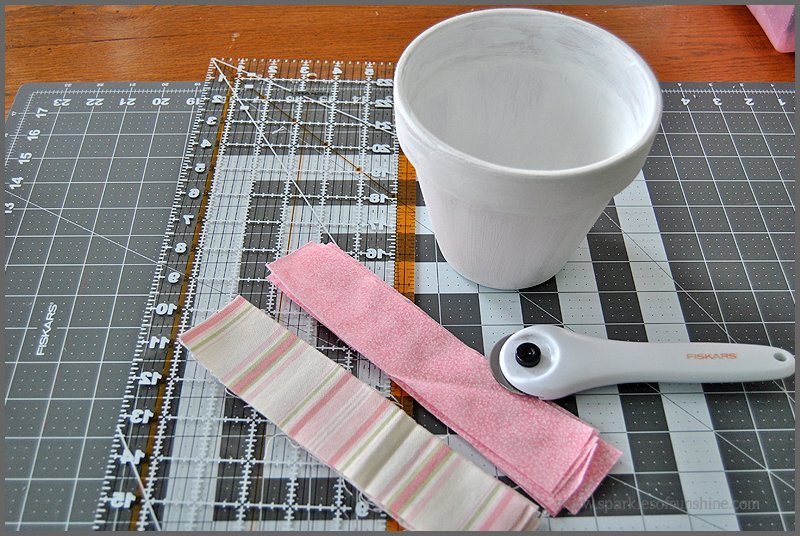
 Here is what you will need for this project:
- Foam brush
- Mod Podge Fabric Formula
- Rotary cutter and cutting board
- Fabric scraps
- White Paint
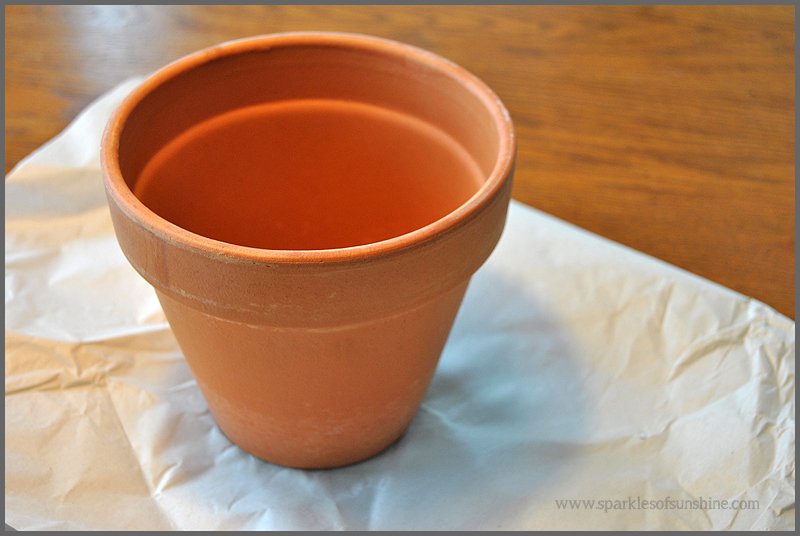
- Flower Pot
Instructions:
- Paint your flower pot first. I suggest using white paint because if your fabric is thin the color underneath may show through. I used FolkArt Home Decor Chalk Paint in White Adirondack.
- While you’re waiting for the paint to dry, you will need to cut your fabric into strips. The size of your strips will depend on the size of your pot. Measure your pot and allow extra to wrap around the top and bottom edges (about 2 inches). I cut my strips 1 1/2 inches wide, but you can cut yours wider if you’d like.
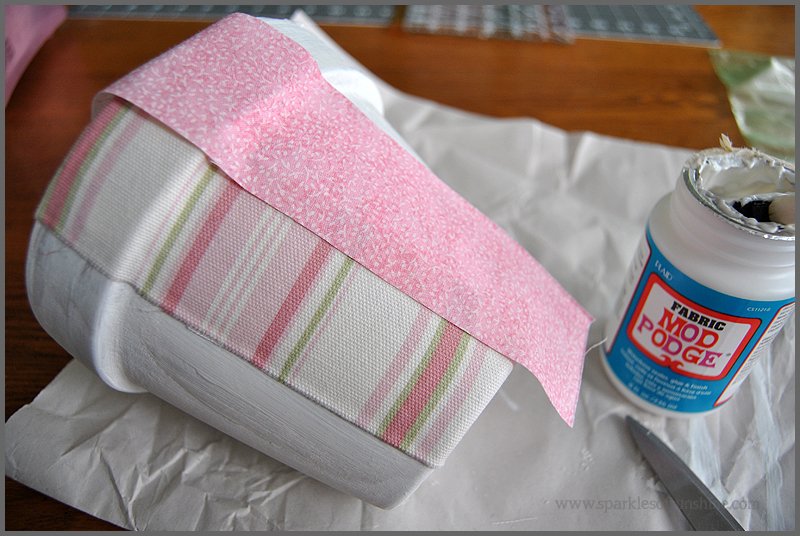
- Apply Mod Podge generously to one side of the pot. Lay a fabric strip diagonally across the pot and smooth it into place.
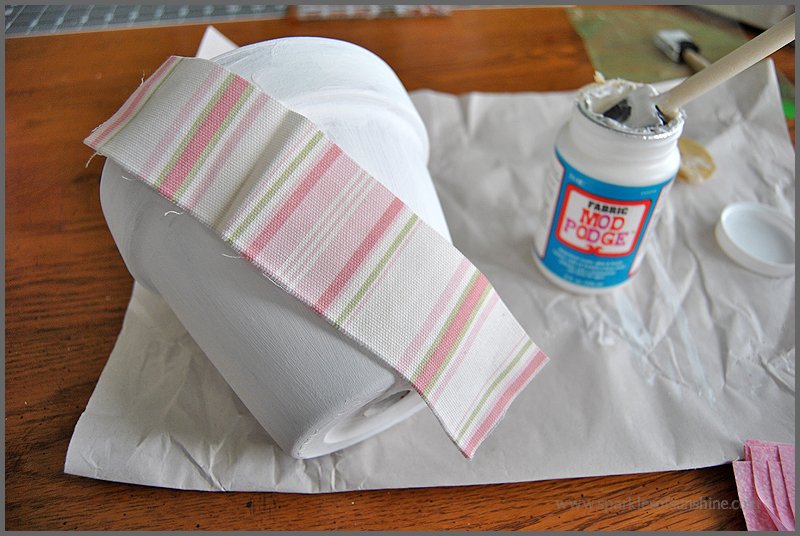
- Apply Mod Podge along the inner rim and bottom of the pot, folding the fabric over the edges and smoothing it into place.

- Lay a strip of alternating fabric across the pot, slightly overlapping the last strip, and smooth into place. Apply more Mod Podge if needed to secure the fabric to the pot.
- Like earlier, apply Mod Podge to the inner rim and bottom of the pot and smooth fabric over the edges. As you apply more strips to the pot, you may have to fold the fabric over underneath before securing it to the pot with Mod Podge so that it will lay flat.
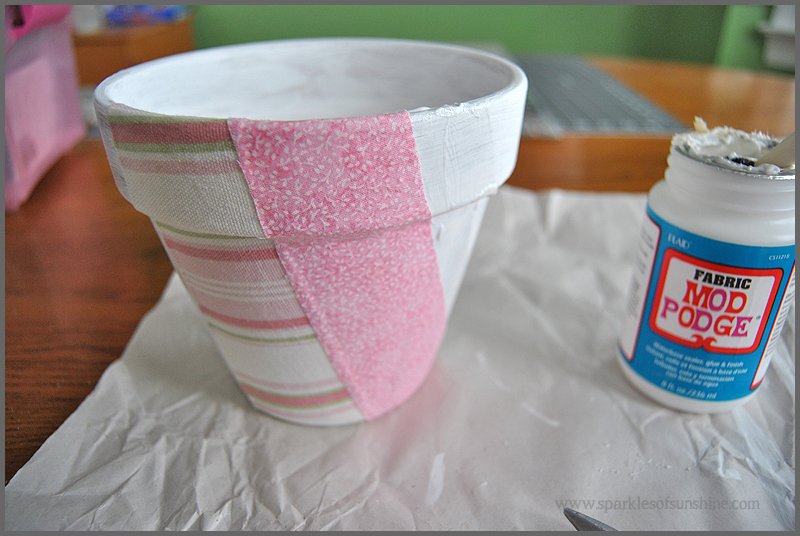
- Continue apply the fabric strips in alternating fabrics, applying more Mod Podge as you work your way around the pot.
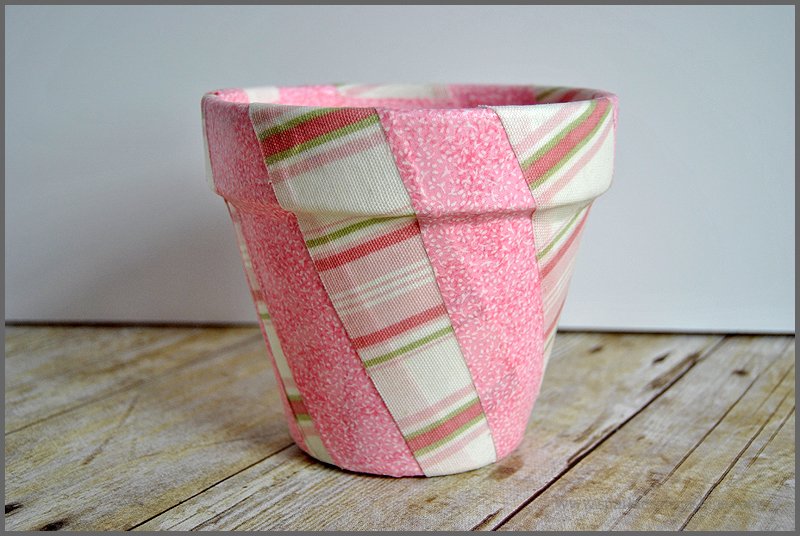
- Once the pot is completely covered with fabric, apply a generous layer of Mod Podge to the entire pot to seal it. If you plan to use your pot outside, be sure to use Mod Podge Outdoor. Allow it to dry.
- Once the flower pot is no longer tacky, you can add your flowers and enjoy!
 I think this Fabric Covered Flower Pot would make a great gift for Mother’s Day this year. You could even go further and customize it by adding an initial or other design cut out of fabric before applying the top layer of Mod Podge. You know I’m here to inspire you into creativity, so I hope you take my idea and run with it to make it your own. If you decide to try this project, I’d love to know about it!
Shared with: Lou Lou Girls Fabulous Party, Teach Me Tuesday, Treasure Box Tuesday, Create Link Inspire Linky Party, Two Uses Tuesday


This turned out beautifully! So shabby chic! Can I tell you a secret..i have never used the fabric version of mod podge lol. I always use the matt finish regular stuff..for EVERYTHING hahaha.
The only reason I used Fabric Mod Podge is because someone gave it to me. 🙂 Otherwise, I’d be just like you and use the Matte finish. I love it!
Popping over from Teach Me Tuesday =) This it too cute! I’m always looking for mod podge projects, not that I do them but I like to collect them =)
After my first attempt at Mod Podge, I never thought I’d be a fan, but I admit I love it now! I’m so glad you stopped by today, Sarah! 🙂