
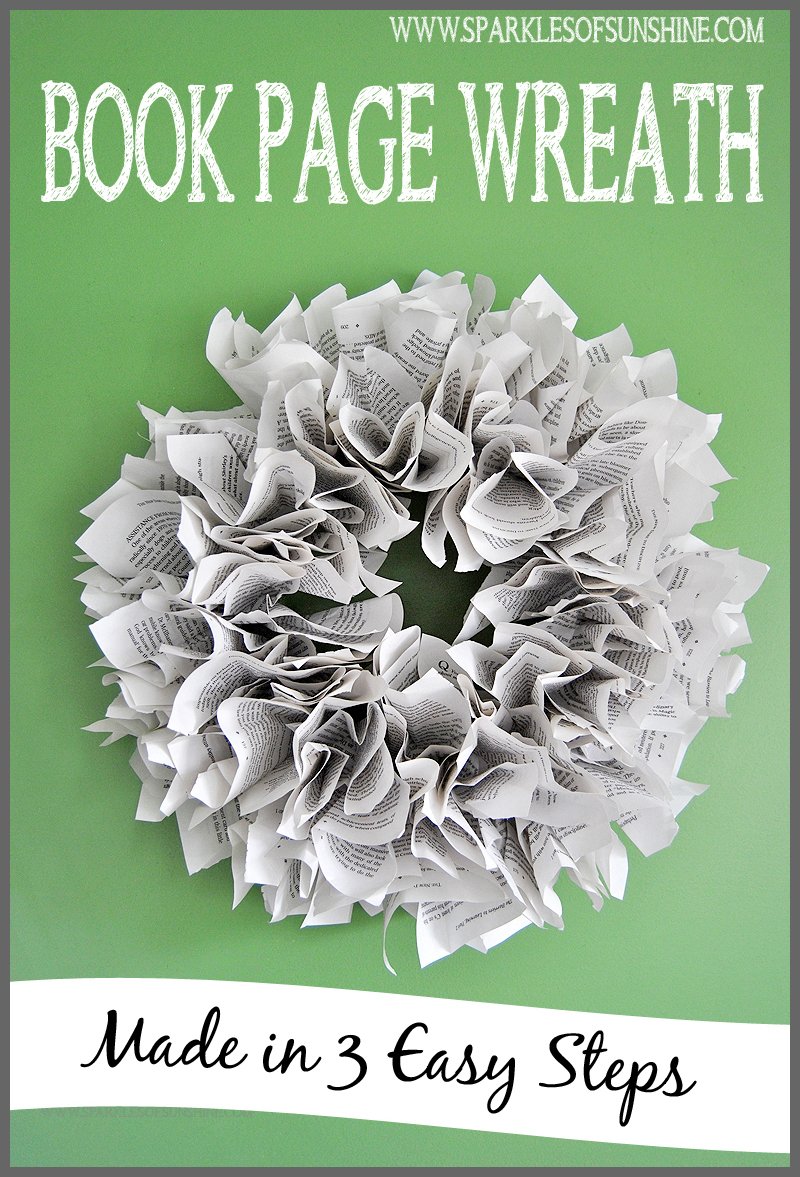
As an avid book lover, the first time I saw a book page wreath I immediately fell in love with it. So when I organized a craft for Women’s Night at our church awhile back, I decided this easy book page wreath would be a project everyone would love. As one lady walked into the room and saw my wreath she said, “I could never do that.” The encouraging crafter I am, I walked up to her and said, “Yes, you can. It’s a lot easier than it looks.” She said, “Oh no, I mean I could never tear the pages from a book…I love books too much!” I reassured her and told her, “If a former English teacher like me can do it, so can you!” She still didn’t seem convinced.
Yes, this project does require slowly ripping the pages of a book from its spine, but as long as you choose a book you’ve already read it shouldn’t be a problem for you. Even better, use a poorly written book and you won’t feel any guilt as you rip it apart. Or you can opt and have someone rip out the pages for you, which is what the lady at our church’s Women’s Night did.
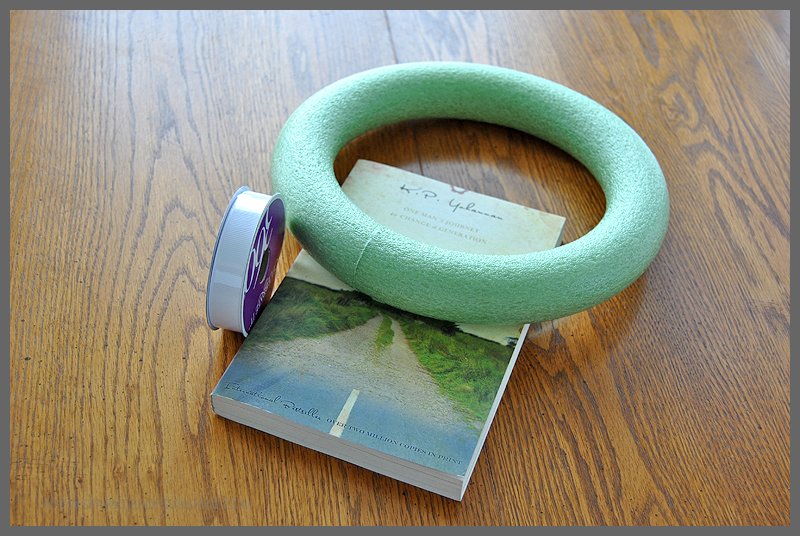
What I love about this project is that it can be made in 3 easy steps. Yes, that’s it! Let’s get started. For this project you will need the following:
- Book of your choice
- Highlighter or magic marker with a wide barrel
- Wreath form
- Glue gun/hot glue sticks
- A piece of ribbon for the hanger
Step One
The first step is super easy. It’s time to rip out the pages from your book. The amount of pages you use will depend on the size of your book and how full you want your wreath to be. I used less than 100 pages for my wreath.
Step Two
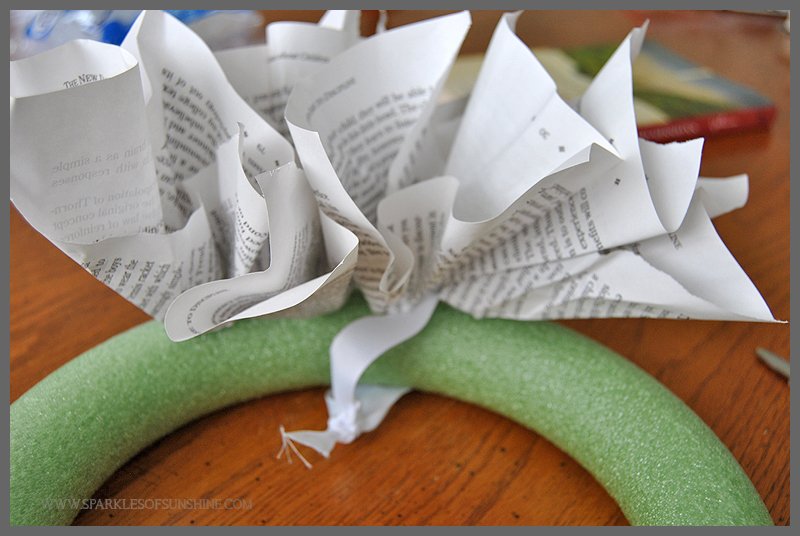
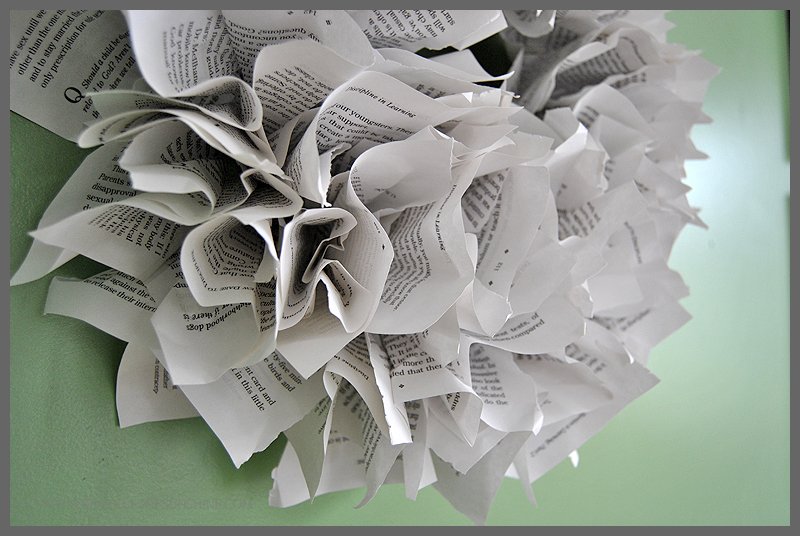
Now it’s time to fold the pages. Place your highlighter or magic marker in the middle of the book page, then wrap the page around it like in the picture below.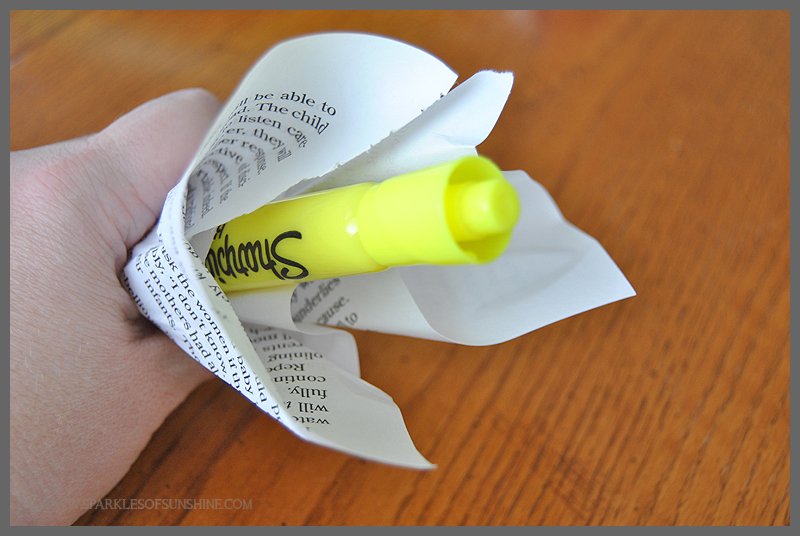
Step Three
Add a drop of hot glue to the end of your book page and use the highlighter to press the page to the top of the wreath form.
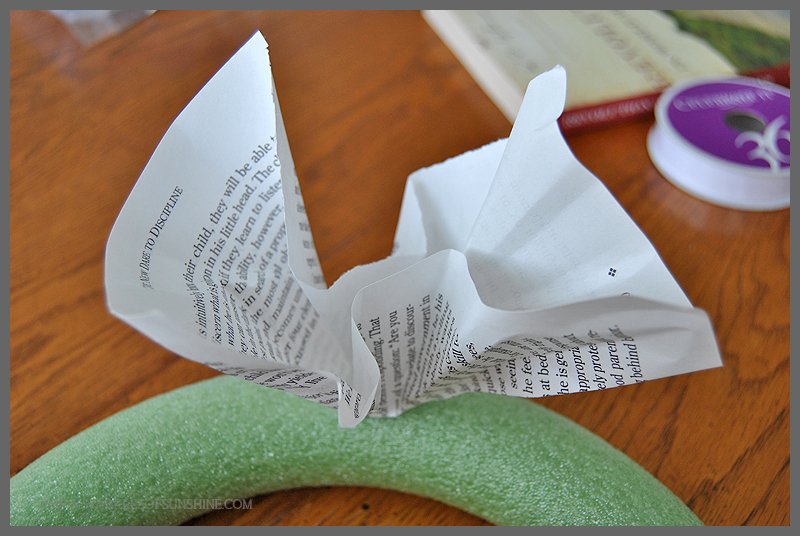
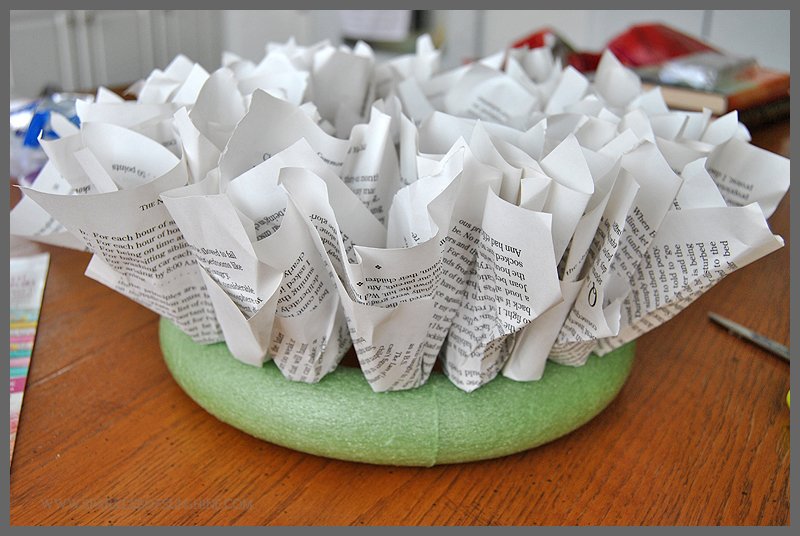
Repeat the three steps above, gluing the book pages in a line around the wreath form.
Once you are done with the top layer you will need to add a second layer, gluing the book pages to the outside of the wreath form.
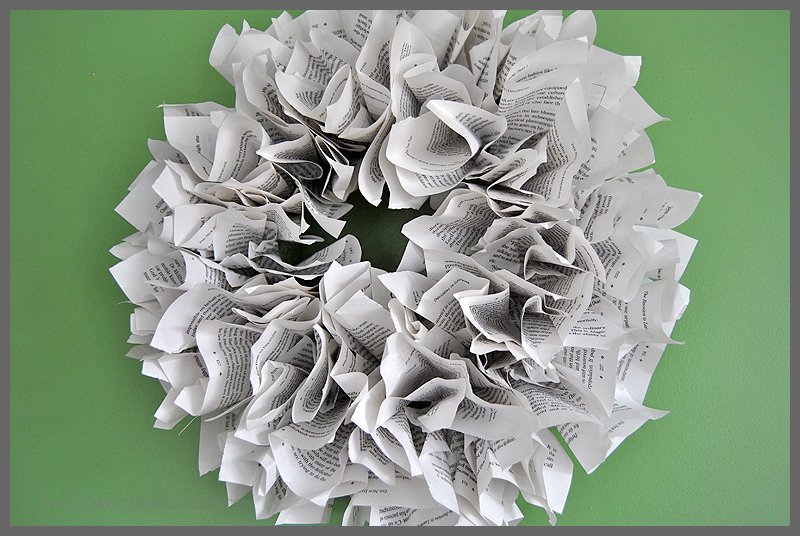
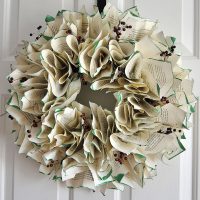
Once you have two full layers of book pages added to your wreath, cut a piece of ribbon and attach it to the wreath form for easy hanging.

Wasn’t that a breeze? I told you it was just 3 each steps to making this wreath. Rip, fold, glue. That’s all it takes!
The grand total for this project? Since I purchased the wreath form at the Dollar Tree Store, the book from a thrift store and used the hot glue I already had on hand, it only cost me $1.10 to make this wreath. Wow!
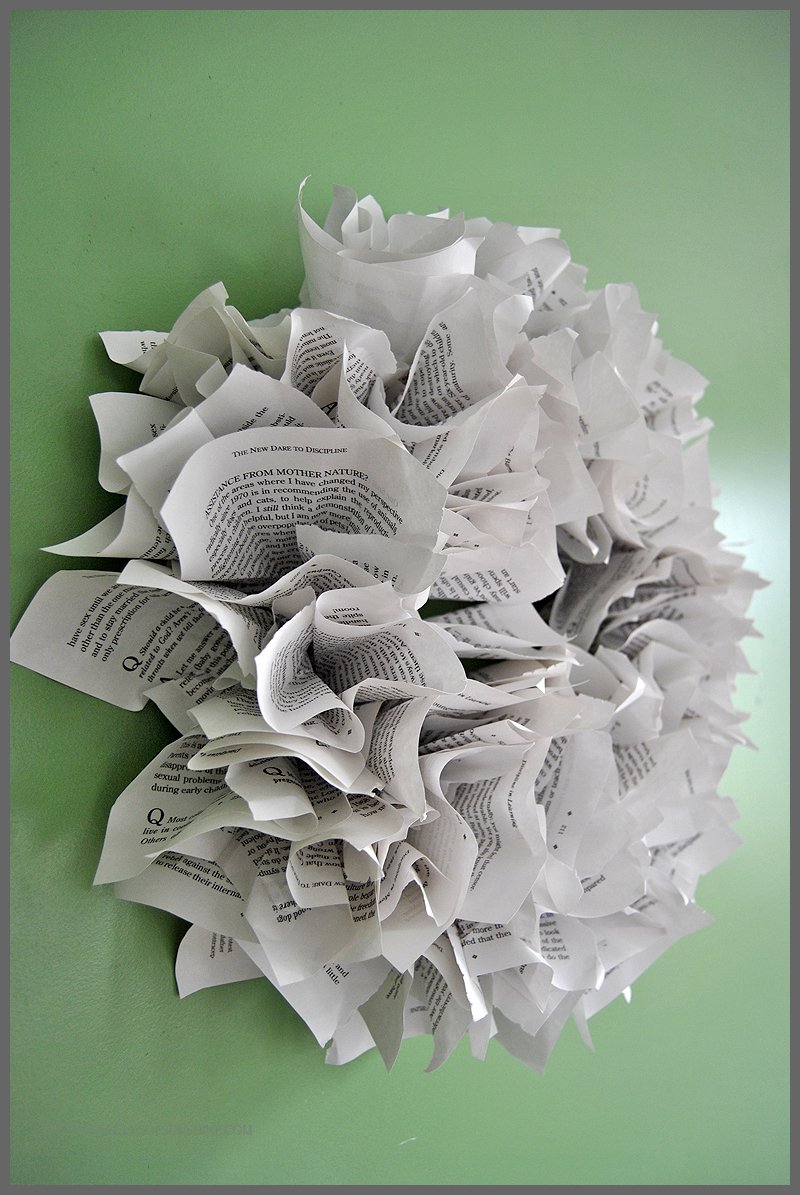
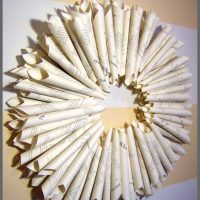
I just love those ruffled layers…don’t you? I’m not sure if I like this wreath or my Easy Book Page Wreath better….
If you want to add interest to your wreath, try painting just the edges of the book pages and let them dry before you start folding them. Or use an old book and add a burlap bow for a vintage look. Use your imagination to make your wreath unique. When you make one, I’d love for you to share it with me!


This looks great, Christie! I love the tip of using a marker to make it easier to shape each page for the wreath. That’s such a good idea. I’m going to give this a try!
Thanks, Beverly. It really does make it easy. You’ll be glad you gave it a try!