
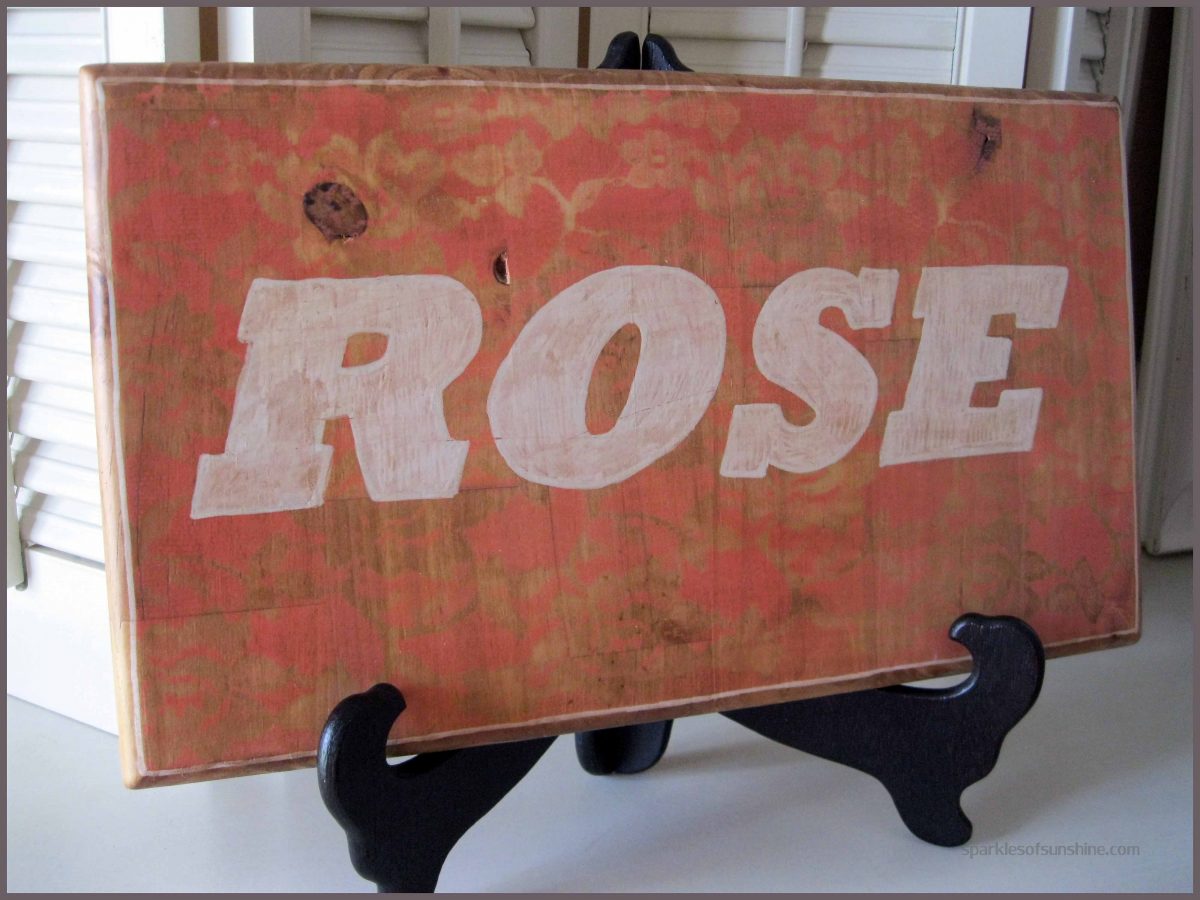
This project started out as a test piece for another project which will be revealed on the blog next week. I like to say that I’m resourceful and don’t like for good things to go to waste, so I decided I would find a use for this painted piece of wood. When I visited my neighbor the day I painted this piece, I took it with me to show her and get her opinion. She really liked the vintage look of the lace print on the wood, and I walked away knowing my test piece was going to become a gift for her. I decided to make a name sign for my neighbors with this test piece, and I’m really happy with the way it turned out.
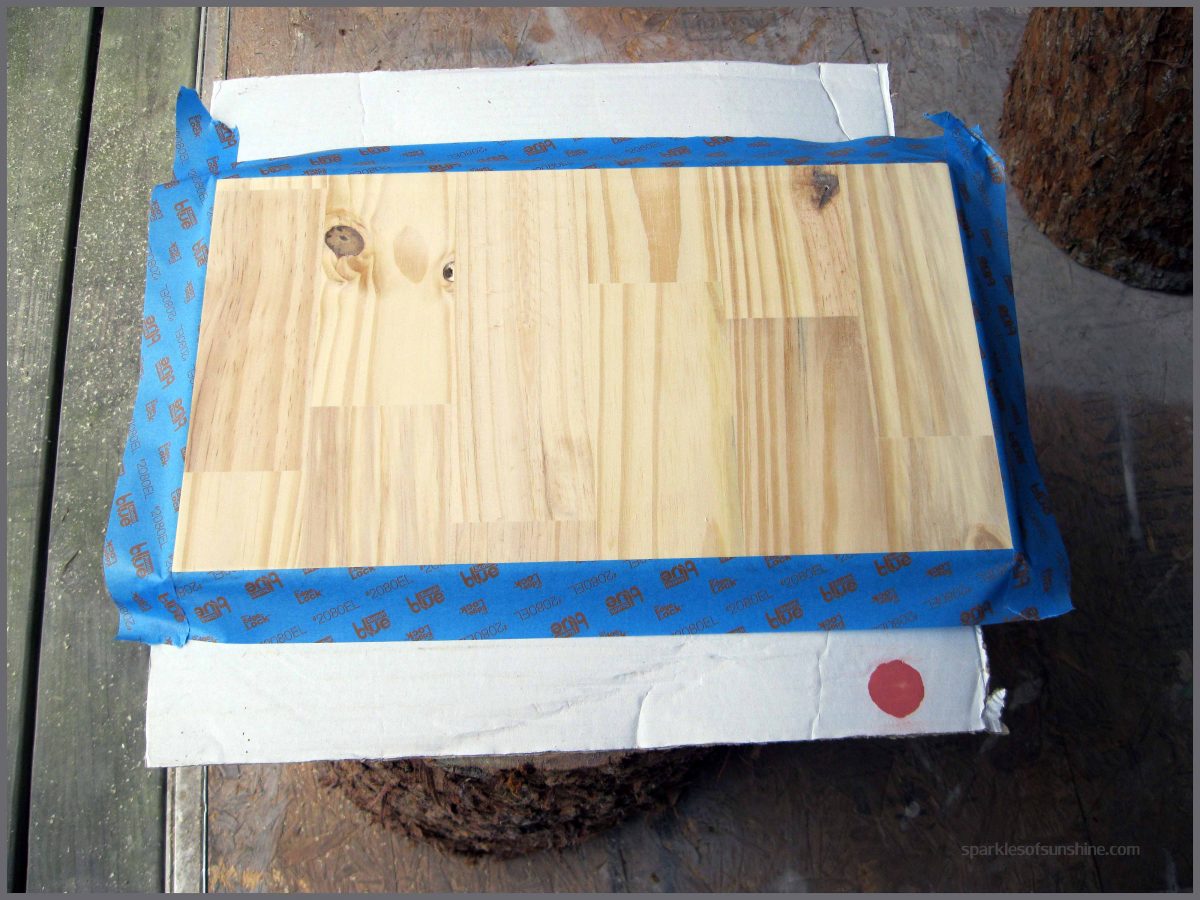
 I had seen pictures of various furniture pieces painted by using lace as a stencil, and I decided to give it a try. I started out with a scrap piece of wood, and taped the edges to frame it.
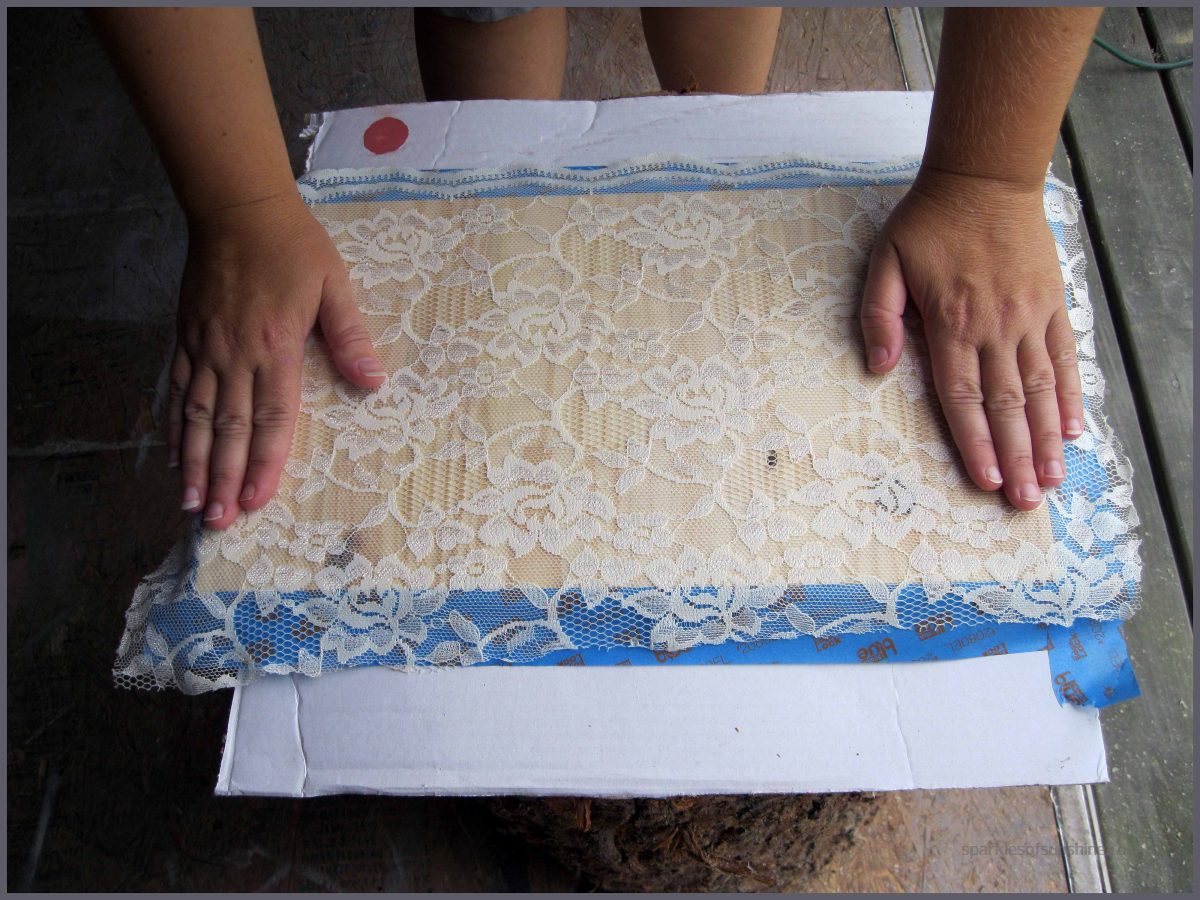
 Next, I laid a piece of lace across the piece of wood, smoothing it with my hands to make sure it laid flat.
 I then held the spray paint can about 10 inches above the piece and lightly sprayed a coat of paint on it. I didn’t paint too closely to prevent the force of the spray from bleeding underneath the lace.
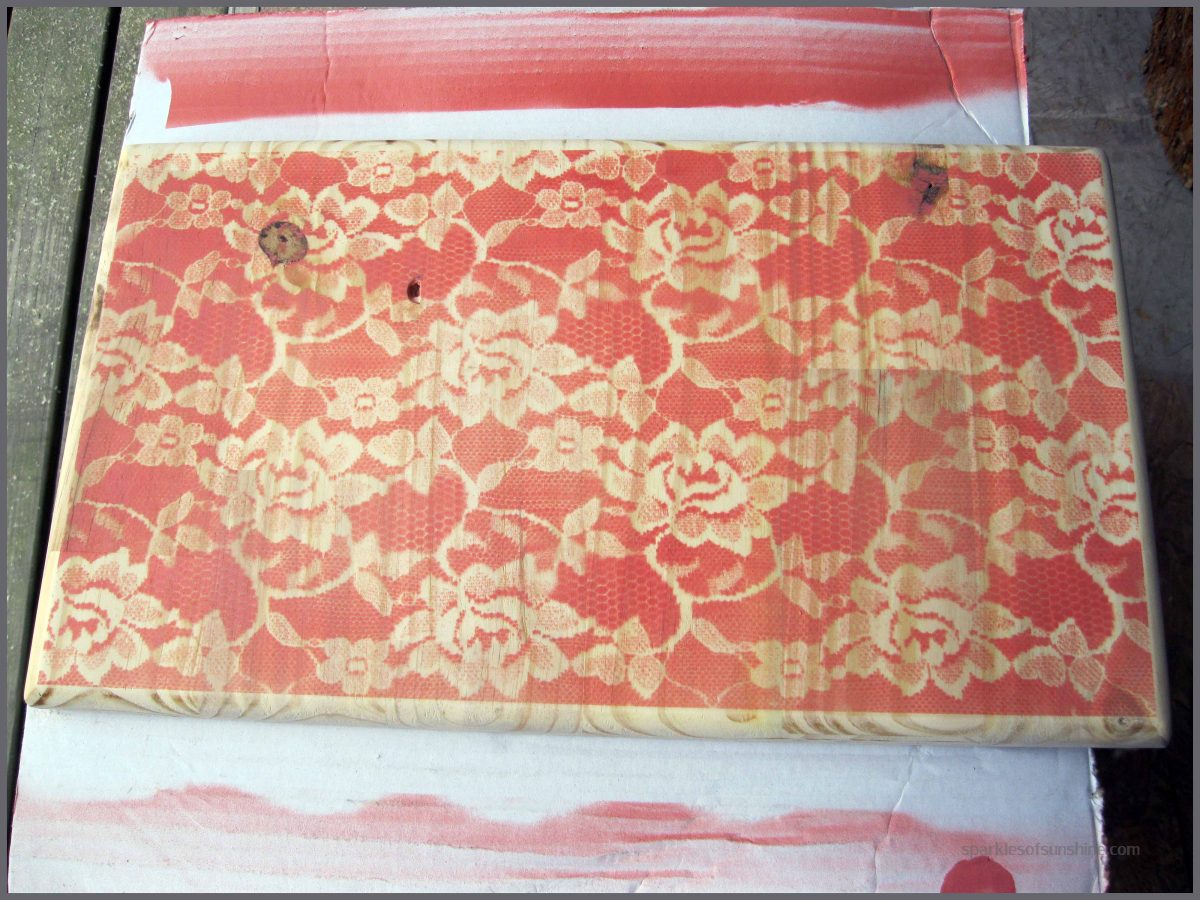
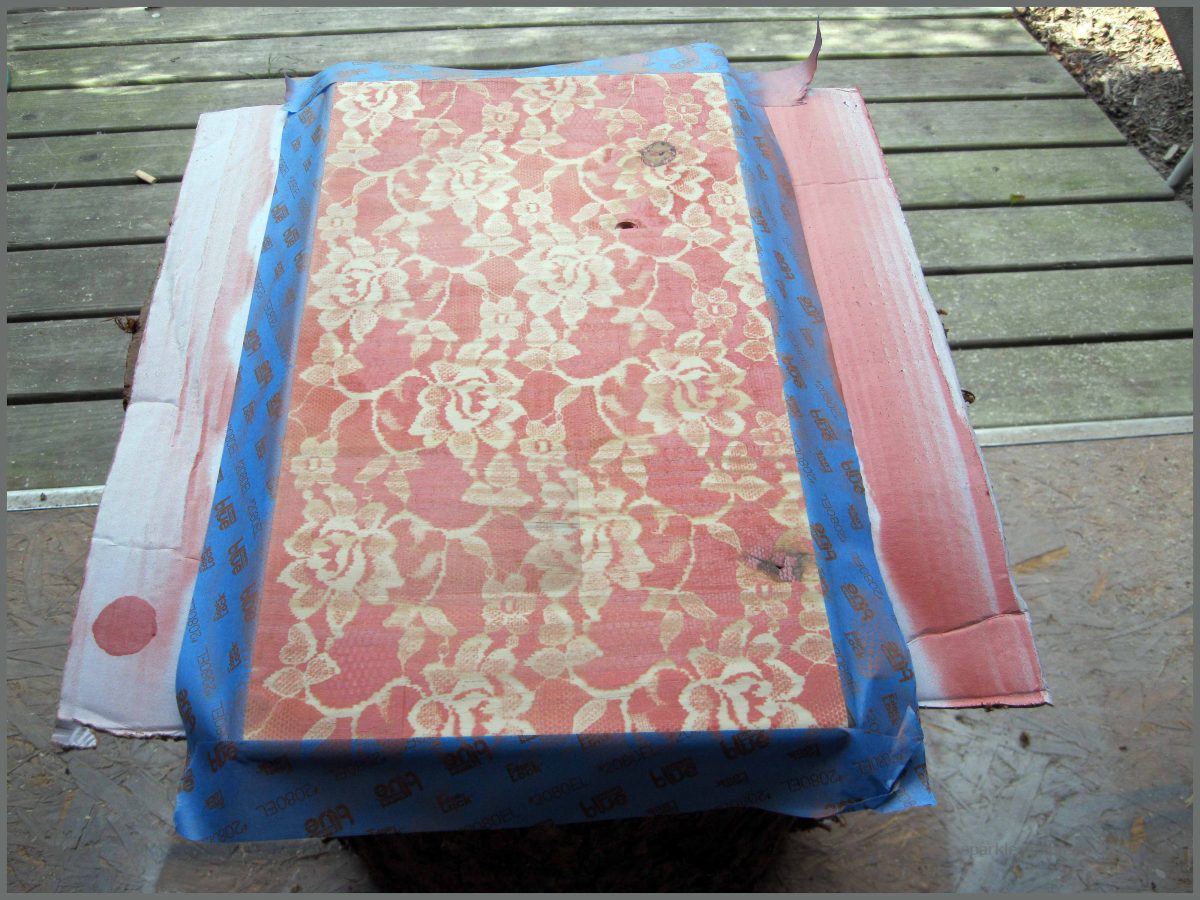 When I lifted the lace and removed the tape, a beautiful piece of wood remained with a painted lace design on it. Isn’t that cool? I was so happy this turned out so well! I can’t wait to show you the project I was testing this process out for, but it will have to wait until next week. Now, remember, this project doesn’t stop here. I had to find a use for this beauty!
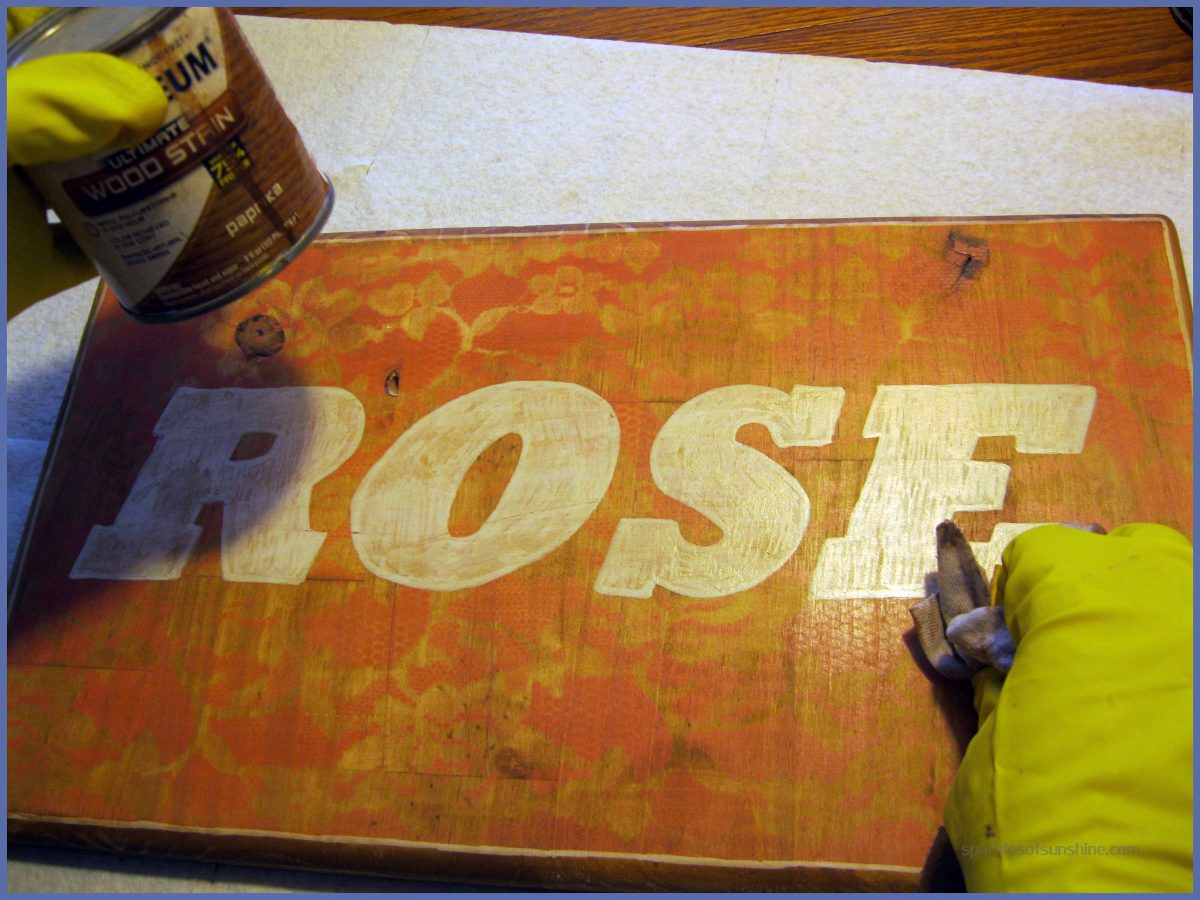
 I used my printer to create the lettering for my sign, and used carbon paper to trace the design onto the piece of wood.
 I then used paint pens to color in the design on the wood. I also used the paint pens to draw a line around the edge of the paint to frame the sign.
 I decided to use these paint pens because I like the way they dry on wood. You can see the marks of the pen up close. Since I was going to make this piece look vintage, I thought the stain would settle into these creases and create a great look, which it did.
 After a light sanding to create some distress, I pulled out my stain and used a rag to apply it and rub it in to create the aged look I was going for. I kept adding more stain until I achieved my desired result.
 The last step was to spray a thin coat of sealer on it and I was done. Finis!
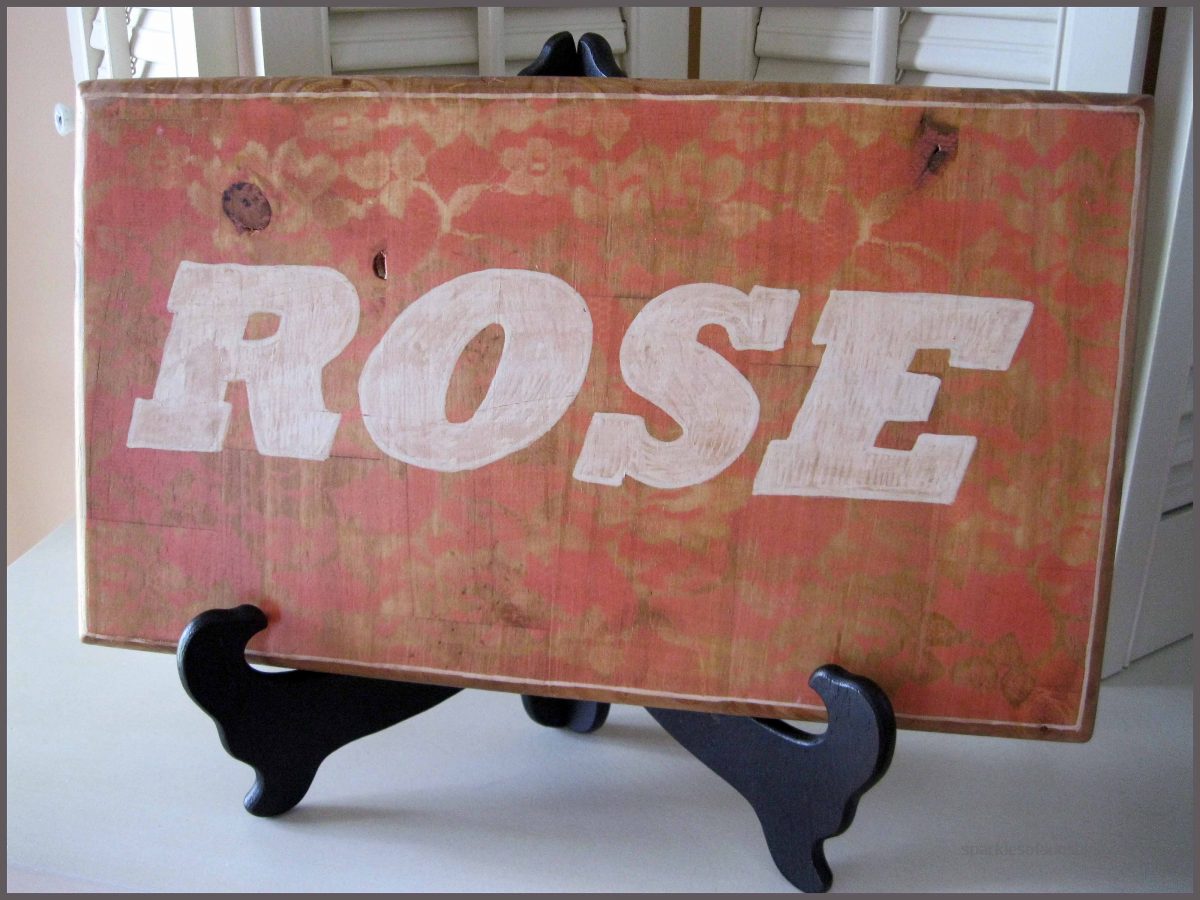 What do you think of this vintage lace painted wood sign? I really like the way it turned out, and I hope my neighbors do, too! Do you like the look of lace painted onto the wood? Do you want to give it a try? Make sure to visit the blog next week when I reveal the project that prompted this test piece. You don’t want to miss it!
*Shared at the following Linky Parties: Inspire Me Please, Junkin Joe, Link Party Palooza, The Party Bunch, Retro Re-pin Party


I love the way this turned out. Great tutorial too!
Thanks so much for stopping by, and I’m glad you liked the sign, too. My neighbors were very happy to receive it!
This is lovely. I found this via your desk transformation post, which is also lovely. Your tutorials are great!
Thanks so much Beverly. I’m glad you like it!