
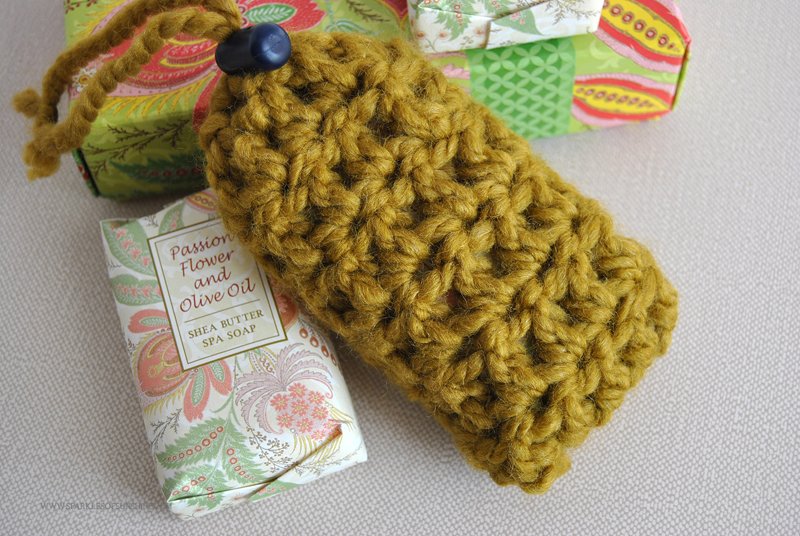
Tired of purchasing soap savers over and over again? I was until I came up with my own solution, a crochet soap saver pouch. Unlike store bought ones, this soap saver is made to last. Today I’m sharing the free crochet pattern with you for this week’s edition of Frugal Gift Friday. You can make this easy project as a gift, or keep it for yourself. I’ll let you choose what you should do!

Years ago I started purchasing my husband soap saver pouches. I’m not sure why I started doing this, but probably because I hate soap scum. It seemed like every time I turned around, his soap saver was falling apart and it was time to buy a new one. The soap savers I found at stores like Walmart and Target just weren’t made to last, and I was tired of throwing my money away. I decided it was time to make one instead. I wanted to crochet one, and since I couldn’t find a pattern I liked online I came up with my own.
When I thought of making this project I was hooked on Lion Brand Yarns Wool-Ease yarn. I had used it to make scarves, hats, even a dog sweater, so why not use it to make a soap saver pouch? It’s thick texture helps it stand up to repeated use, and since it’s slightly scratchy it provides some exfoliation for your skin. But the real reason I chose this yarn is because it’s a bulky yarn, and you can whip up projects with this yarn in record setting time. Today’s crochet soap saver pouch is no exception since I whipped in up in less than 15 minutes. This would make a great last minute gift!
Here is what you will need for this project:
- Lion Brand Yarns Wool-Ease Thick & Quick in your color choice
- Size N Crochet Hook
- Drawstring Stopper
- Yarn Needle
- Scissors
Pattern Directions:
- Chain 11. Join with slip stitch in first chain to form a ring.
- Row 1: Chain 3. DC in each DC around. Join with a slip stitch in top of chain 3.
- Rows 2-5: Chain 3. DC in each DC around. Join with a slip stitch in top of chain 3.
- Row 6: Chain 3. Turn. DC in each DC around (11 stitches). Join with a slip stitch in top of chain 3.
- Finish off and weave in ends.
- Finishing: Use a yarn needle to sew one end of the soap saver together. Cut a piece of yarn and weave through the DC stitches at the open end of the soap saver. Pull yarn through the drawstring stopper, then tie ends together into a knot to create a loop for hanging.
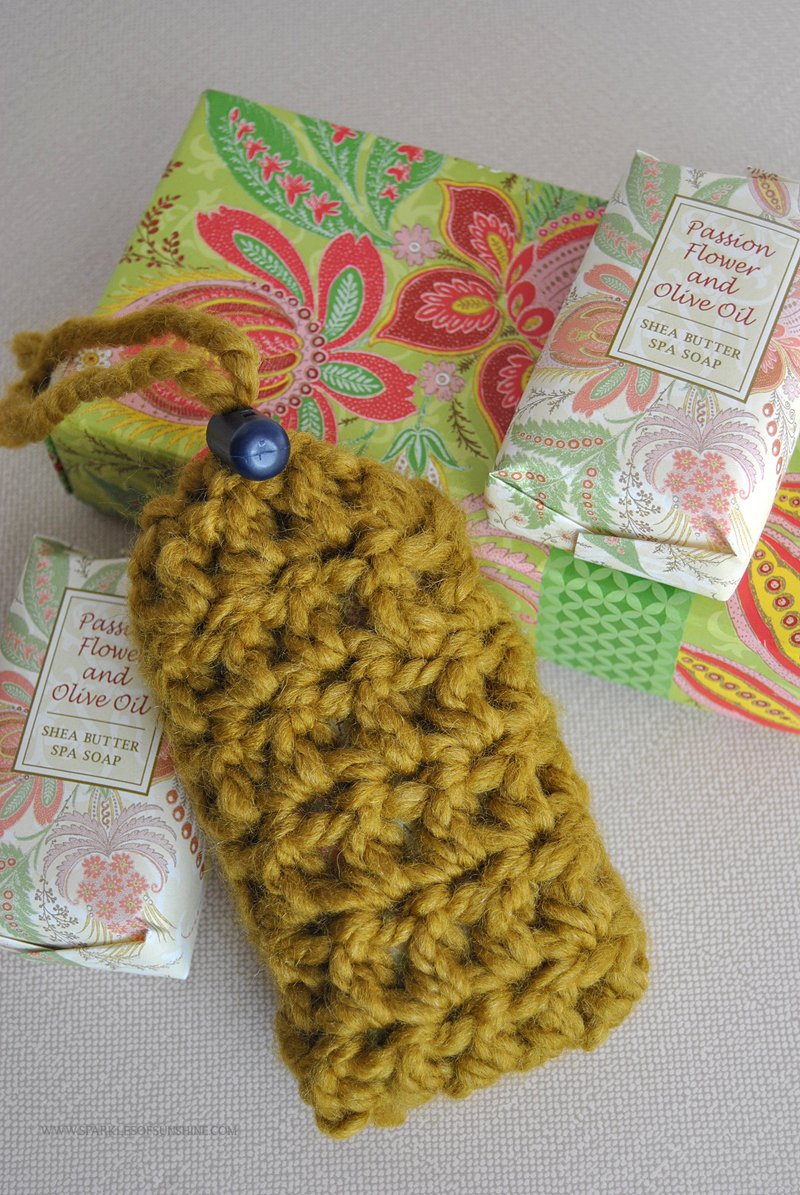
To use, insert a bar of soap into the pouch and secure into place by pulling the drawstring stopper tight. Wet the soap saver pouch with warm water and massage it with your hands until you generate a lather for bathing. This crochet soap saver pouch will keep your soap from turning to mush in your shower. You can use it over and over again, and just run it through the wash when it needs a good cleaning. My husband has been using his for a couple of years, and it still works great. I hope you enjoy the pattern!
In case you missed them, here are this year’s previous Frugal Gift Friday projects:
- Christmas Cookie Sugar Scrub
- Easy Sew Wrist Support
- Upcycled Clipboard Easy Art Display
- Decorated Wooden Kitchen Utensils
- Personalized Cake Carrier


Cute pattern I shall have to make some – thank you for sharing with Pin Worthy Wednesday